
To perform soil drench tests for root-feeding larvae, start by identifying early signs of infestation and select a suitable solution based on your soil type. Carefully prepare your test area, calibrate equipment, and apply evenly around the roots. Timing is key—treat before larvae become active and reapply every 4 to 6 weeks as needed. Monitoring soil and pest activity helps evaluate success, and understanding common challenges guarantees better control—keep exploring for detailed guidance.
Key Takeaways
- Properly identify larvae and signs of infestation to determine the need for soil drench treatment.
- Assess soil type, moisture, and health to select appropriate drench solutions and application methods.
- Apply solutions evenly around root zones, using calibrated equipment for consistent coverage.
- Monitor soil conditions and larval activity post-treatment to evaluate effectiveness and adjust strategies.
- Schedule reapplications every 4 to 6 weeks, considering pest activity, soil conditions, and crop stage.
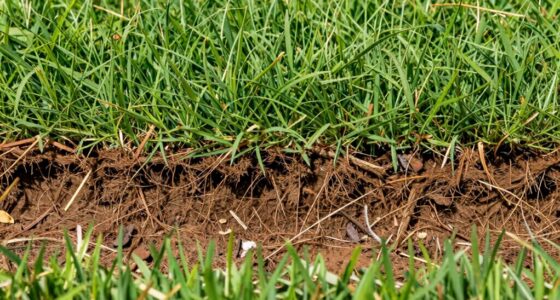
Understanding Root-Feeding Larvae and Their Impact on Crops

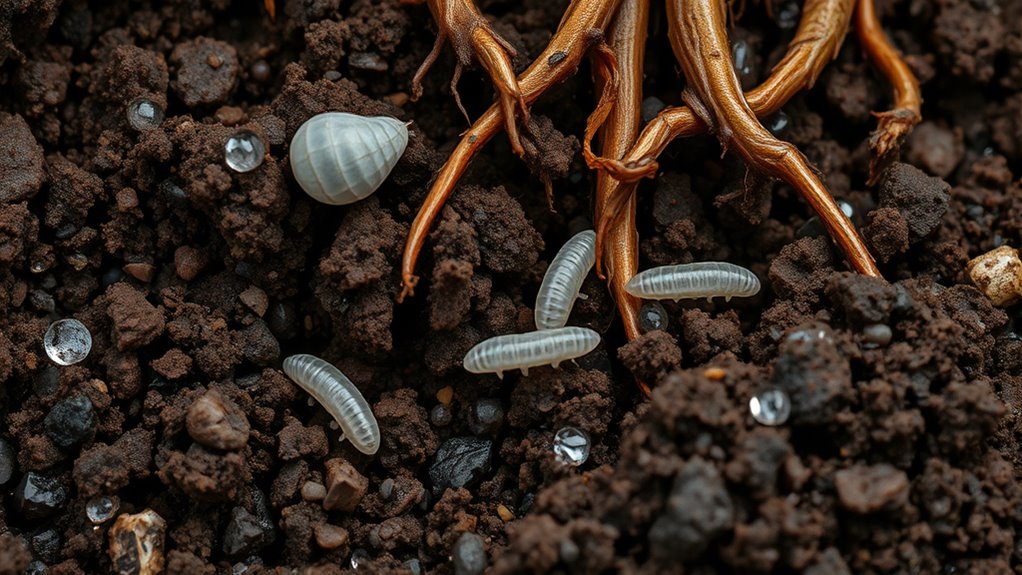
Root-feeding larvae pose a significant threat to crop health because they directly damage plants underground. You need to recognize the signs of root damage, which often include stunted growth, wilting, and yellowing leaves, even when watering is adequate. Proper larvae identification is essential in managing infestations; look for small, soft-bodied insects or tunnels within the roots. These larvae typically resemble grubs or maggots and are found close to the root zone. Understanding which species are present helps you determine the severity of the threat and choose appropriate control measures. Accurate identification of larvae can also inform your approach to Honda Tuning, ensuring you select the most effective strategies for pest management. Early detection of root damage and accurate larvae identification can prevent widespread crop loss, ensuring you maintain healthy plants and optimize yields.
Selecting the Appropriate Soil Drench Solution
Choosing the right soil drench solution is essential for effectively controlling root-feeding larvae and protecting your crops. You need to consider soil composition and nutrient balance to ensure the solution penetrates effectively without disrupting vital soil health. Selecting a solution suited to your soil type improves larval contact and minimizes unnecessary nutrient leaching. Here’s a quick comparison:
| Soil Type | Recommended Drench Solution | Notes |
|---|---|---|
| Sandy | Water-based, low nutrient concentration | Drains quickly, needs frequent application |
| Loamy | Balanced nutrient solution | Ideal for most crops |
| Clay | Solutions with chelating agents | Improves penetration in dense soils |
| Organic matter | Organic-compatible solutions | Maintains soil health |
| Saline | Diluted solutions to prevent salt buildup | Prevents further soil degradation |
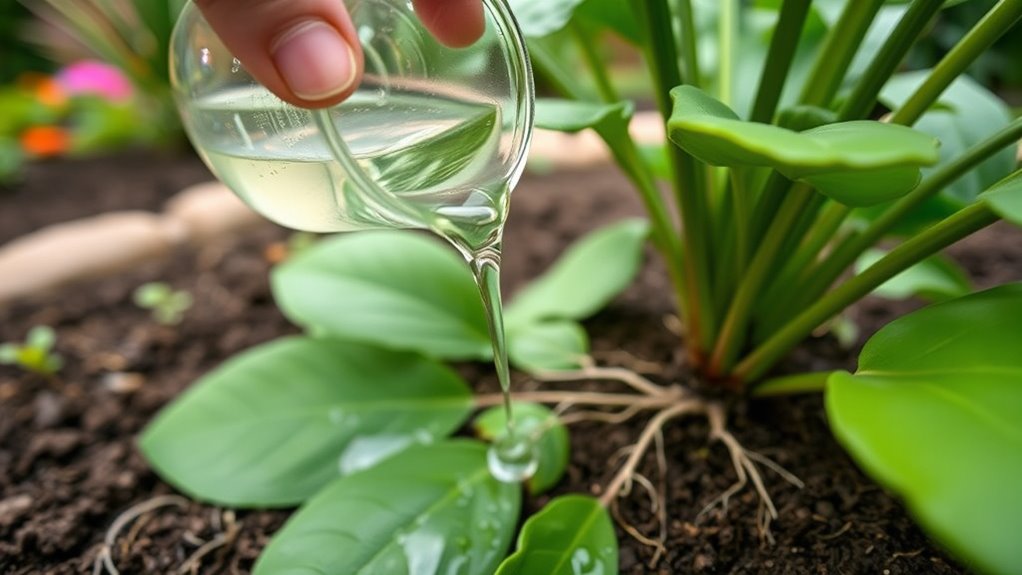
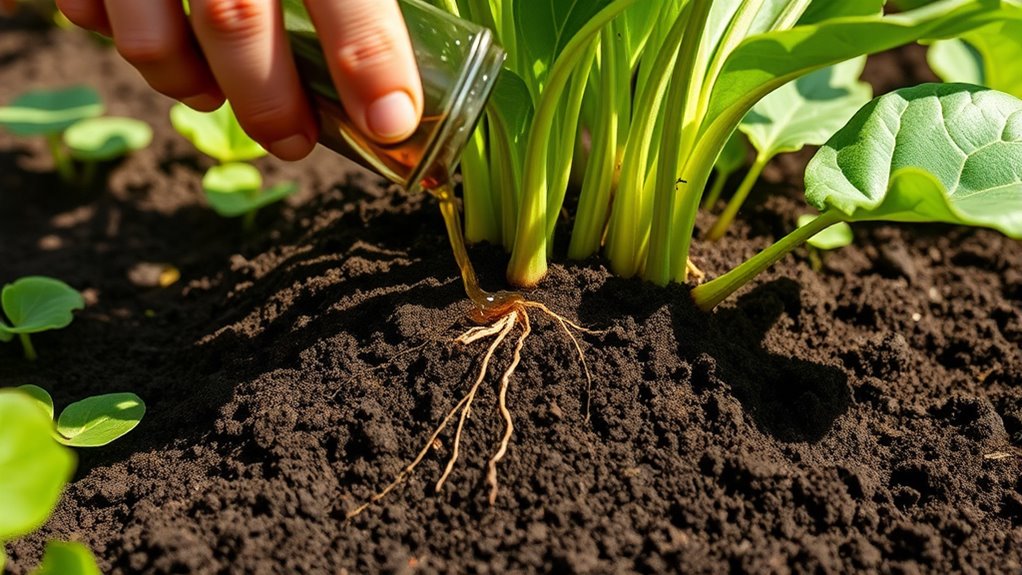
Preparing for a Soil Drench Test
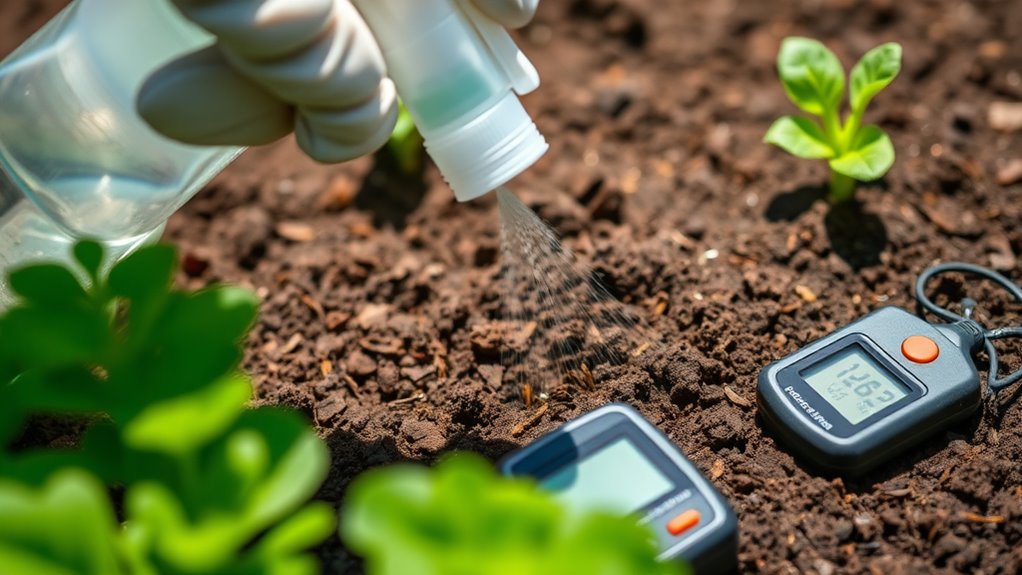
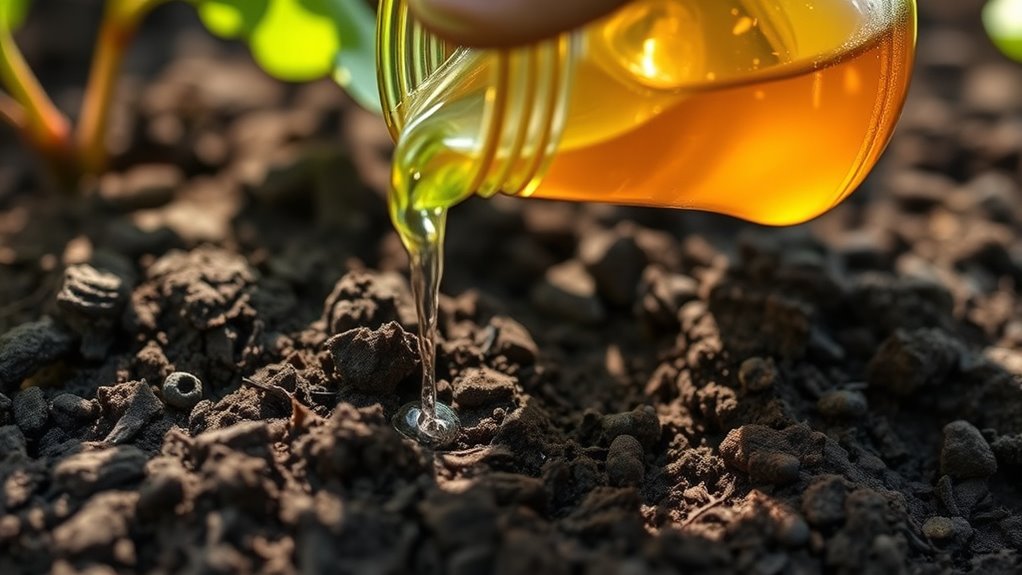
Before conducting a soil drench test, it’s important to properly prepare your testing area and materials. First, assess the soil composition to ensure it’s representative of the affected area; note its texture, moisture, and organic matter. This helps determine the appropriate solution concentration and volume. Next, check your equipment calibration to guarantee accurate delivery of the soil drench. Calibrate your sprayer or watering device according to manufacturer instructions, ensuring consistent flow rates and volumes. Clear the testing zone of debris and obstructions to prevent uneven application. Gather all necessary materials, including gloves, measuring tools, and test solutions. Proper preparation minimizes variability and improves the reliability of your test results. Additionally, understanding soil health can help tailor your testing approach to achieve more precise outcomes.
Application Techniques for Effective Soil Drenching
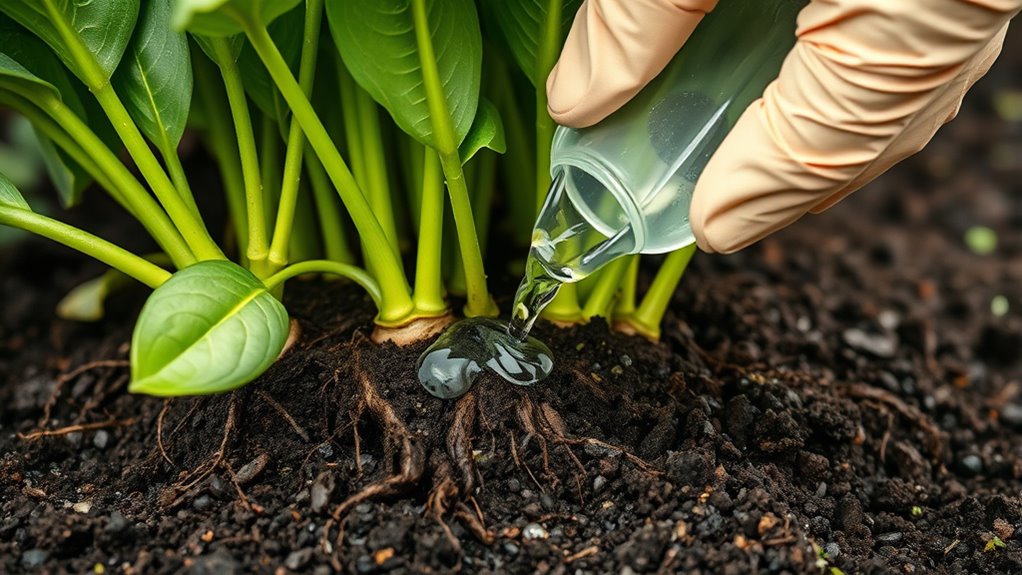
To guarantee the soil drench effectively reaches the plant roots, you should focus on applying the solution evenly and thoroughly around the affected area. This ensures good contact with the soil and promotes better penetration to target root-feeding larvae. Maintain consistent application pressure to avoid pooling or dry spots, which can compromise soil health and reduce treatment efficacy. Incorporate crop rotation practices to help improve soil structure and reduce pest populations over time, making soil drenching more effective. Use a calibrated watering device to control flow rate and coverage. Proper technique minimizes runoff and ensures the solution infiltrates deeply. Regularly inspect your application to confirm even coverage and adjust as needed, optimizing pest control while preserving soil vitality. Additionally, understanding the beneficial ingredients in soil drench solutions can enhance their effectiveness and support overall soil and plant health.
Timing and Frequency of Soil Drench Treatments

To get the best results, you need to time your soil drench treatments carefully. Knowing when to reapply guarantees the treatment remains effective without overdoing it. Monitoring soil conditions helps you decide the right timing and frequency for your specific needs.
Optimal Treatment Timing
When is the best time to apply soil drench treatments for maximum effectiveness? The ideal timing depends on understanding soil chemistry and pest activity. Apply treatments just before larvae become active or when they are most vulnerable, typically early in the season or during soil warm-up. Monitoring pest emergence helps you target the larvae efficiently. Additionally, consider crop rotation schedules; planting resistant crops after treatment can reduce reinfestation risks. Adjusting application timing based on soil chemistry—such as pH levels and moisture—ensures the treatment penetrates effectively and minimizes runoff. Proper timing also takes into account the contrast ratio of the soil and environment, which can influence treatment absorption and effectiveness. Applying treatments at the right time enhances pest control, reduces chemical use, and promotes healthier soil and crops. Proper timing is key to maximizing soil drench benefits and long-term pest management.
Reapplication Frequency Guidelines
Determining how often to reapply soil drench treatments is essential for maintaining effective pest control without overusing chemicals. You should consider factors like soil amendment practices and crop rotation schedules to optimize timing. Reapplication frequency depends on pest pressure and soil conditions, typically every 4 to 6 weeks. Visualize the soil remaining protected as larvae emerge and feed. Keep in mind:
- Soil amendments can influence chemical absorption
- Frequent reapplications may harm beneficial organisms
- Crop rotation disrupts pest life cycles
- Consistent intervals prevent pest resurgence
- Adjust based on pest activity and environmental factors
- Incorporating top-rated cake pop recipes can make pest control efforts more appealing during outreach or community events.
Monitoring Soil Conditions
Monitoring soil conditions is crucial for timing and scheduling soil drench treatments effectively. Regularly check soil health indicators like moisture levels, temperature, and pest activity to determine the best treatment window. Healthy soil can better withstand treatments, so maintaining proper crop rotation helps prevent pest buildup and soil degradation. Water parks in various locations often incorporate environmental management practices that could serve as a model for sustainable soil treatment approaches. Adjust your drench schedule based on these observations, avoiding unnecessary applications when conditions aren’t ideal. Keep records of soil conditions over time to identify patterns and determine when soil health might decline, signaling the need for intervention. Proper monitoring ensures treatments target larvae when they’re most vulnerable, reducing chemical use and promoting sustainable pest management. Ultimately, staying attentive to soil conditions supports effective control and long-term soil vitality.
Monitoring and Evaluating Larval Activity Post-Treatment
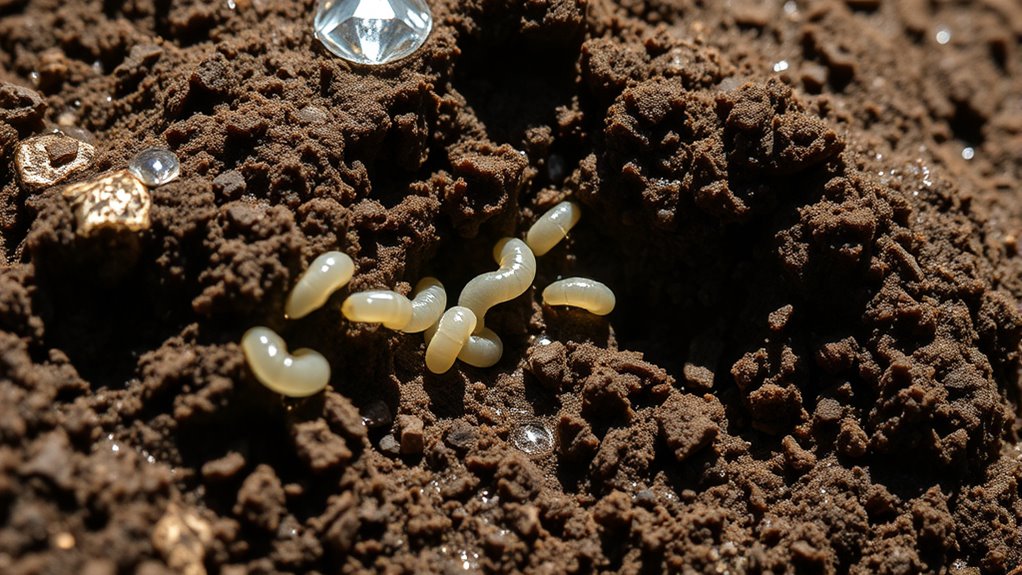
After applying a soil drench treatment, it’s essential to actively monitor larval activity to assess its effectiveness. Pay attention to changes in larval behavior, such as reduced movement or surface activity. Observe soil health indicators like moisture levels and soil texture, as these influence larval survival. You might notice:
- Fewer larvae crawling near the surface
- Larvae appearing sluggish or disoriented
- Less tunneling activity beneath the soil
- Soil showing signs of improved structure
- Reduced larval feeding damage on roots
Monitoring these signs helps you determine if the treatment disrupts larval behavior effectively. Consistent observation allows you to gauge the impact on soil health and larval activity, ensuring your approach is working without disturbing the overall ecosystem balance. Soil health indicators are crucial for understanding the broader impact of your treatment.
Interpreting Soil Drench Test Results

When reviewing soil drench test results, you should focus on analyzing larval mortality to determine how effective the treatment was. Look for patterns that show significant declines in larval activity, which indicate successful control. By carefully evaluating these outcomes, you can better understand the treatment’s overall effectiveness and plan future actions accordingly. Additionally, understanding risk management strategies can help in optimizing treatment approaches for better long-term results.
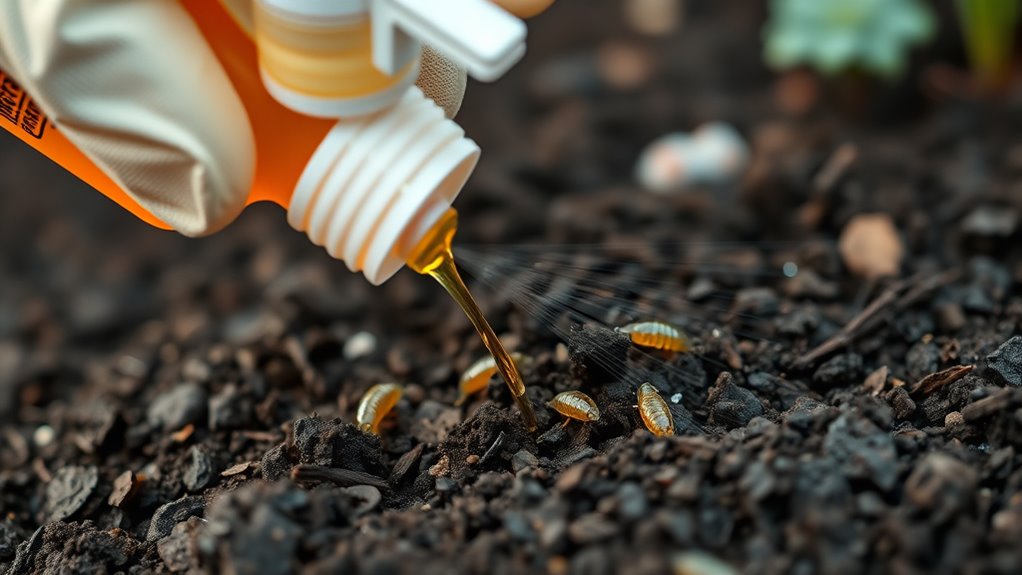
Analyzing Larval Mortality
Interpreting soil drench test results involves carefully evaluating larval mortality to determine treatment effectiveness. You should observe how soil composition and root aeration influence results. Healthy, well-drained soil with good aeration often enhances larval exposure to the treatment. Look for signs like:
- Reduced larval numbers in treated areas
- Larvae appearing dehydrated or immobile
- Soil texture changes, such as compaction or looseness
- Evidence of chemical penetration, like discoloration
- Variations in larval distribution correlating with soil features
High mortality rates suggest the drench effectively reaches larvae, especially where soil allows better movement and chemical contact. Conversely, poor results may indicate issues with soil structure, such as compaction or poor aeration, limiting the treatment’s reach and impact. Proper soil conditions play a crucial role in ensuring the success of soil drench treatments.
Evaluating Treatment Effectiveness
Evaluating treatment effectiveness through soil drench tests requires analyzing larval mortality data alongside soil conditions. First, review larva identification to confirm you’re targeting the correct species, as different larvae respond uniquely. Next, consider soil composition, since factors like organic matter, moisture, and pH influence treatment absorption and larval survival. If mortality rates are high and consistent across samples, it indicates the treatment’s efficacy. Conversely, low mortality or uneven results suggest the need to reassess application methods or soil conditions. Comparing results over multiple tests helps you determine if the treatment consistently reduces larvae populations. Regular monitoring and understanding soil properties are essential to optimize treatment success. Always document soil characteristics, larval identification, and mortality data to make informed decisions about treatment adjustments and future applications.
Common Challenges and Troubleshooting Tips
Despite careful planning, soil drench tests can present several challenges that may affect their accuracy and effectiveness. Variations in soil chemistry can alter larval behavior or survival, making results unreliable. Misidentification of larvae can lead to incorrect conclusions about pest presence. You might also encounter uneven application of the soil drench, causing inconsistent exposure. Environmental factors, like recent rainfall, can dilute treatments and skew data. Additionally, soil heterogeneity complicates sampling and interpretation. To troubleshoot:
Soil drench tests face challenges like soil variability, misidentification, uneven application, and environmental factors.
- Monitor soil pH and nutrient levels regularly
- Use proper larval identification techniques
- Apply uniform drench volumes
- Schedule tests during stable weather
- Collect multiple samples for representative results
Addressing these issues enhances test reliability and provides clearer insights into root-feeding larval activity.
Integrating Soil Drench Tests Into Pest Management Programs
To effectively incorporate soil drench tests into your pest management plan, you need to contemplate the best timing for application to maximize impact. Monitoring and evaluating the results regularly help you determine if adjustments are necessary. By staying attentive to these points, you can improve your overall pest control strategy and reduce unnecessary treatments.
Timing and Application Timing
Timing is critical when integrating soil drench tests into your pest management program, as applying treatments at the right moments can substantially boost their effectiveness. You should monitor soil conditions closely, especially soil pH and moisture levels, to determine ideal application times. Applying drenches when the soil is moist ensures better penetration, while adjusting for soil pH can improve chemical efficacy. Suitable timing includes:
- When soil moisture is at its peak after irrigation or rainfall
- During early larval development stages
- Before pest populations reach damaging levels
- When soil pH is within the effective range for your treatment
- Just prior to plant stress periods for better absorption
Monitoring and Evaluation
How can you guarantee your soil drench treatments are effective over time? Regular monitoring and evaluation are key. Start by examining soil composition since it influences how well the treatment penetrates and persists. Keep track of weather patterns, especially rainfall and temperature, because they affect soil moisture and larval activity. Conduct soil tests periodically to measure larval presence and treatment residuals. Observe plant health and signs of pest activity as indirect indicators. Adjust your pest management program based on these evaluations, applying additional drenches if necessary. Document all data to identify trends and determine treatment longevity. This proactive approach ensures treatments remain effective, minimizes unnecessary applications, and integrates soil drench tests seamlessly into your overall pest management strategy.
Best Practices for Sustainable Larval Control
Implementing sustainable larval control requires careful attention to best practices that balance effectiveness with environmental responsibility. Focus on organic alternatives to chemical pesticides that promote soil health. These methods reduce long-term harm and support beneficial organisms. To achieve this, consider:
- Applying soil amendments that boost microbial activity
- Using targeted soil drenches to minimize runoff
- Rotating crops to disrupt larval life cycles
- Incorporating organic mulches to protect soil structure
- Monitoring larval populations regularly for timely intervention
Frequently Asked Questions
How Long Does It Typically Take to See Results After a Soil Drench?
When you apply a soil drench, you might expect to see results within a few days to a week, but timing expectations can vary based on the product and pest. You should observe initial signs of activity or pest reduction around the first week, with more noticeable results often appearing within two to three weeks. Monitoring your plants regularly will help you track these observation milestones and assess the treatment’s effectiveness.
Can Soil Drench Tests Be Used for All Types of Root-Feeding Larvae?
You might wonder if soil drench tests work for all root-feeding larvae. The answer is no, because larvae diversity varies greatly, and some may not be affected by soil penetration methods. While soil drench tests can target many larvae, those that burrow deep or have protective behaviors might evade detection. So, you need to contemplate larvae behavior and soil type to determine if soil drench tests are suitable for your specific situation.
Are There Environmental Concerns Associated With Soil Drench Applications?
Imagine a gentle rain washing over a garden—soil drench applications can seep into the environment, raising concerns about environmental impact. You should consider potential non-target effects, where beneficial organisms might be affected alongside pests. While effective, these treatments could unintentionally harm surrounding ecosystems. Being mindful of application methods and timing helps minimize these environmental risks, ensuring you protect both your plants and the broader environment.
What Are the Costs Involved in Conducting Soil Drench Tests?
When you consider conducting soil drench tests, you need to perform a thorough cost analysis to understand the expenses involved. These tests often require specialized equipment, labor, and materials, which can add up quickly. Incorporate these costs into your budget planning to guarantee you’re prepared financially. While the initial investment may seem high, proper planning helps you evaluate the benefits against the costs, making informed decisions easier.
How Do Soil Drench Tests Compare With Other Pest Control Methods?
Oh, sure, soil drench tests seem so simple, but they’re actually part of a smarter approach—integrated pest management. Compared to chemical sprays, they target pests more selectively, supporting biological control and reducing environmental impact. While other methods might be quick fixes, soil drench tests help you understand infestations better, making pest control more sustainable. It’s irony at its finest: the less obvious method can be the most effective.
Conclusion
By understanding root-feeding larvae and mastering soil drench tests, you can protect your crops effectively. While chemical solutions offer quick relief, sustainable practices build long-term resilience. Balancing immediate results with environmental health creates a smarter approach. Remember, testing and timing are your allies—ignoring them risks damage, yet embracing them guarantees healthier roots. In this dance between intervention and preservation, your careful management makes the difference between vulnerability and vitality.