
The key trick to preventing tank mix clumps and clogs is performing a thorough jar test beforehand. By carefully mixing small samples with water and chemicals, you can observe compatibility and stability, ensuring everything blends smoothly. Monitoring how quickly layers form and checking for residues helps you spot problems early. If you want to master this simple technique and avoid costly clogs, keep going—they’ll guide you through the process step-by-step.
Key Takeaways
- Conduct a thorough jar test to assess chemical compatibility and prevent clumping before large-scale mixing.
- Add chemicals gradually during the jar test to observe interactions and avoid sudden reactions causing clumps.
- Ensure proper agitation during the jar test to promote uniform mixing and identify potential clogging issues early.
- Record time, temperature, and observations to determine emulsion stability and prevent future tank mix problems.
- Use the jar test results to adjust chemical proportions or order of addition, reducing the risk of clumps and system clogs.
![[2-Pack] Reusable Ethanol Testing Kit - Wide Mouth Fuel Test Bottle for E85 and Ethanol Levels - Fewer Spills and Clear Results in Minutes - Test Hundreds of Times - Two Ethanol Test Bottles Included](https://m.media-amazon.com/images/I/51n+oPbsvaL._SL500_.jpg)
[2-Pack] Reusable Ethanol Testing Kit – Wide Mouth Fuel Test Bottle for E85 and Ethanol Levels – Fewer Spills and Clear Results in Minutes – Test Hundreds of Times – Two Ethanol Test Bottles Included
Wide Mouth Design for Fewer Spills: Designed specifically with a wide mouth to easily pour gasoline and water…
As an affiliate, we earn on qualifying purchases.
As an affiliate, we earn on qualifying purchases.
Why the Jar Test Is Key to Smooth Tank Mixing
The jar test is essential because it helps you determine the best mixing procedures before scaling up to your entire tank. By testing small samples, you ensure chemical compatibility, preventing unwanted reactions that could cause clumping or clogging. This process allows you to identify which chemicals mix smoothly without separation or residue. Conducting the jar test also enables you to observe chemical interactions firsthand, providing insights that are difficult to predict analytically. Improving mixing efficiency is crucial because it saves you time and reduces waste, ensuring your chemicals blend thoroughly. Without this step, you risk inconsistent application or equipment issues once you start working with larger volumes. The jar test acts as a simple yet vital safeguard, giving you confidence that your tank will mix evenly and effectively, avoiding costly mistakes and operational problems. Additionally, understanding chemical compatibility through the jar test supports the broader goal of sustainable and secure cloud solutions by minimizing chemical waste and environmental impact. Incorporating proper testing protocols enhances safety and efficiency in your chemical handling practices. Performing the jar test also helps identify potential reactive interactions, preventing dangerous situations during large-scale mixing. Engaging in this initial step can also reveal subtle differences in chemical behavior, leading to better process control and safety measures.

GEMPLER'S 1024A Basic Pesticide Starter Protection Kit – Protection for Mixing and Applying Most Low-Toxicity Pesticides
Kit includes:
As an affiliate, we earn on qualifying purchases.
As an affiliate, we earn on qualifying purchases.
What Materials You Need and How to Prepare Your Sample

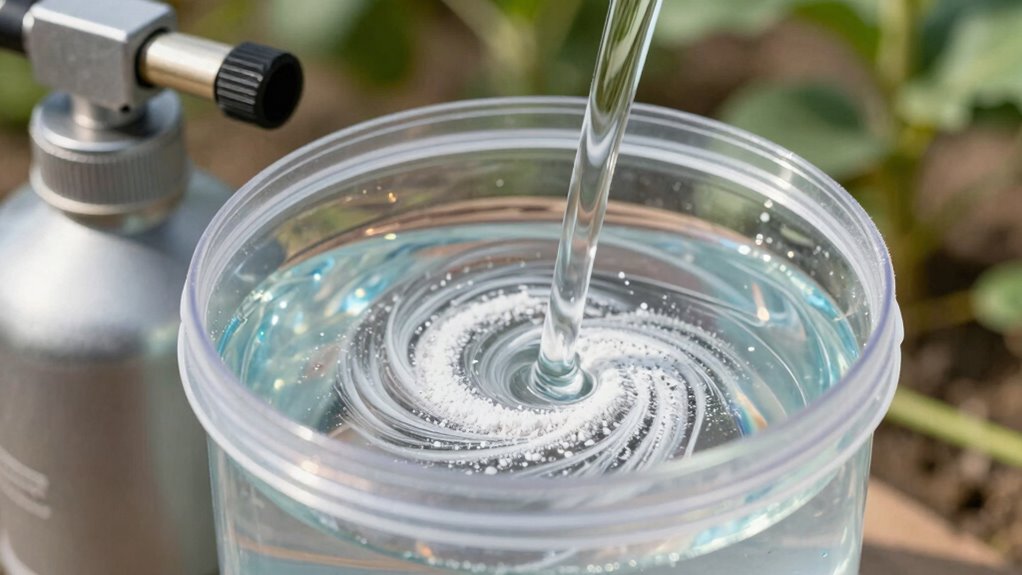
To get accurate results from the jar test, gather the right materials and prepare your sample carefully. Use a clean, transparent jar or bottle to observe mixing and clumping clearly. Wear proper pesticide safety gear, including gloves and goggles, to protect yourself during handling. Measure your water and chemical samples precisely, ensuring equipment calibration is accurate to avoid skewed results. Use a graduated cylinder or measuring cup for liquids, and weigh powders with a scale. Mix your sample thoroughly before testing, ensuring even distribution of chemicals. Proper preparation helps prevent errors and ensures your jar test accurately predicts tank mix behavior. Remember, safety and precision are key to identifying potential clogs before applying pesticides or fertilizers. Additionally, understanding aquatic exercise can help maintain your physical health during long periods of handling chemicals, and being familiar with clog prevention techniques can further reduce the risk of equipment issues. Ensuring proper sample preparation also involves checking for any residues or impurities that could affect the test outcome, which is an important aspect of sample integrity. Conducting a thorough visual inspection of samples can help identify contaminants or foreign objects that might skew results. Taking the time to inspect your samples for contaminants can help ensure your results are reliable.

Liveek Aquarium Aquascape Tools Kit, 4 in 1 Anti-Rust Aquatic Plant Aquascaping Tool Stainless Steel Black Tweezers Scissors Spatula for Aquarium Tank Clean Fish Tank Aquascape Tools Sets (Black)
【4 in 1 Aquascape Tools Kits】: Aquarium tank aquascape tools kits including 1*10.5" curved scissors, 1*10" straight tweezers,…
As an affiliate, we earn on qualifying purchases.
As an affiliate, we earn on qualifying purchases.
How to Perform the Jar Test Step by Step
To perform the jar test correctly, you need to gather all the necessary materials first. Then, follow each step carefully to make certain accurate results. Properly conducting the test will help you determine the right treatment to prevent clumps effectively. Incorporating simple organizational strategies can also help keep your testing supplies and routine steps in order, making the process more efficient. Additionally, understanding the fundamentals of creative storytelling can assist in documenting and sharing your testing procedures more clearly. Being familiar with testing procedures and considering the fabric composition can ensure you interpret the results accurately and troubleshoot effectively. Knowing about juice extraction techniques can also be beneficial if your testing involves liquid samples, ensuring the samples are prepared correctly for analysis.
Gather Necessary Materials
Before starting the jar test, gather all the essential materials you’ll need to guarantee accurate results. This ensures you observe proper chemical reactions and follow safety precautions. You’ll need a clear jar or container, a stirring rod or spoon, a measuring cup, and the chemicals or tank mix components. Make sure to wear protective gear, like gloves and goggles, to prevent accidents. Use the table below to understand each material’s purpose:
| Material | Purpose |
|---|---|
| Clear jar or container | Observe mixing and reactions clearly |
| Stirring rod/spoon | Mix chemicals evenly |
| Measuring cup | Ensure accurate proportions |
| Chemicals/Tank Mix | Test for clumping potential |
| Protective gear | Maintain safety during handling |
Additionally, understanding the chemical compatibility of your tank mix can help prevent clumping and clogging issues.
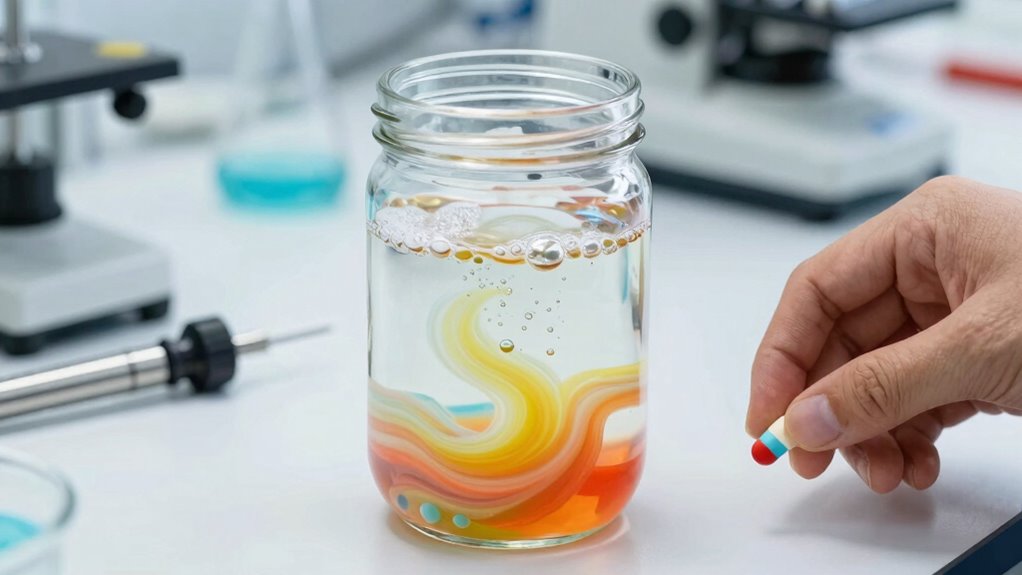
Conducting the Test Properly
Once you have gathered all your materials, it’s time to start the jar test. Fill a clear jar with the sample water and add the chemicals you plan to use, following recommended proportions. Shake the jar gently to promote chemical reactions while avoiding agitation that could cause false results. Observe how the solution reacts, noting any clumping or settling. To ensure accurate results, preserve the sample by labeling it with the date and chemical details. Proper sample preservation prevents contamination or degradation that might skew outcomes. Continue mixing periodically and watch for any signs of incompatibility or precipitation. Recording your observations carefully will help determine the best tank mix combination, preventing clumps and ensuring smooth application. Being aware of chemical compatibility and how different substances interact can further improve test accuracy. Additionally, understanding how chemical interactions can lead to precipitates helps in selecting appropriate additives for your tank mix. Taking note of precipitation risks can also guide adjustments to your mixture to avoid clumping issues. Recognizing the impact of wave and wind effects can also be beneficial for understanding how environmental factors might influence your test results. Moreover, considering temperature fluctuations during testing can help simulate real-world conditions and improve reliability.
agricultural chemical mixing jars
As an affiliate, we earn on qualifying purchases.
As an affiliate, we earn on qualifying purchases.
How to Read Jar Test Results and Check Compatibility
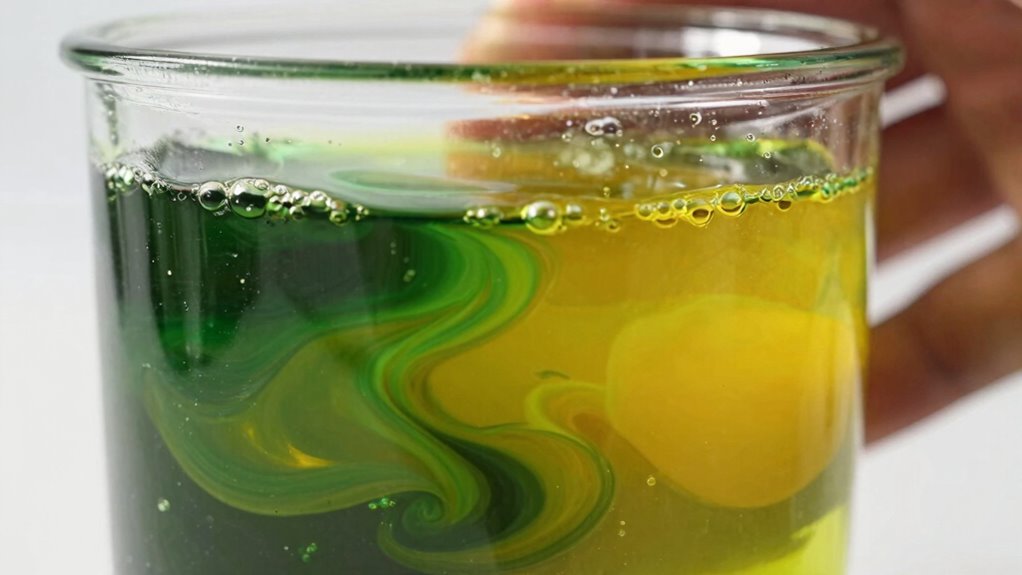
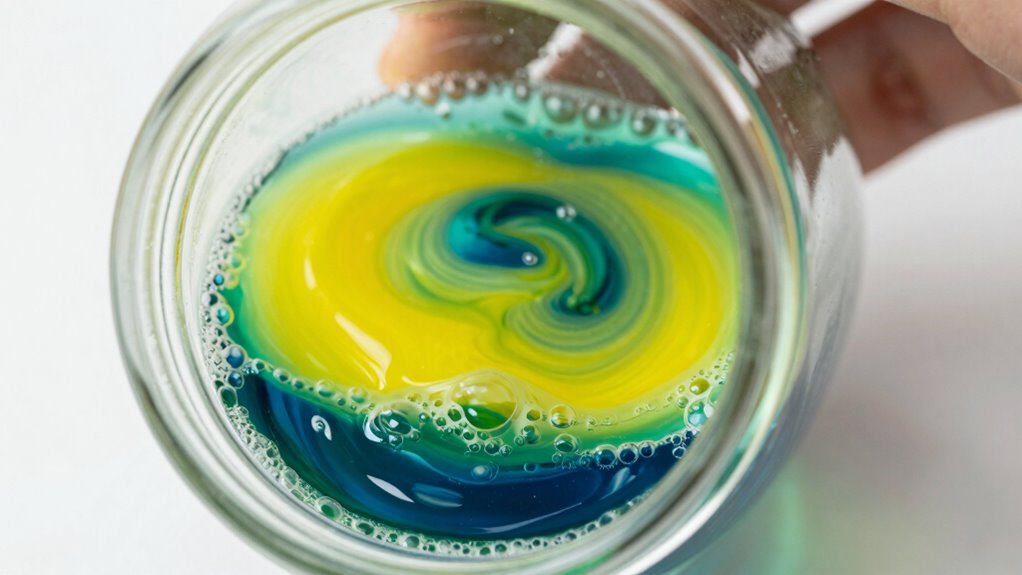
When reviewing your jar test results, pay close attention to how the layers form and separate, as this shows compatibility. Make sure to note the time and temperature during the test, since these factors impact the outcome. Ultimately, record how well the ingredients mix and if any clumping occurs to determine the best adjustments. Youngster Choice can be a helpful resource for understanding how different factors influence test results. Additionally, understanding chemical compatibility can help you interpret the test outcomes more accurately and prevent issues like clumping or clogging. Monitoring test conditions, such as agitation speed and sample volume, can also provide insights into the test’s accuracy and reliability. Recognizing the importance of test variables can further improve your ability to interpret results effectively.
Observe Layer Formation Carefully
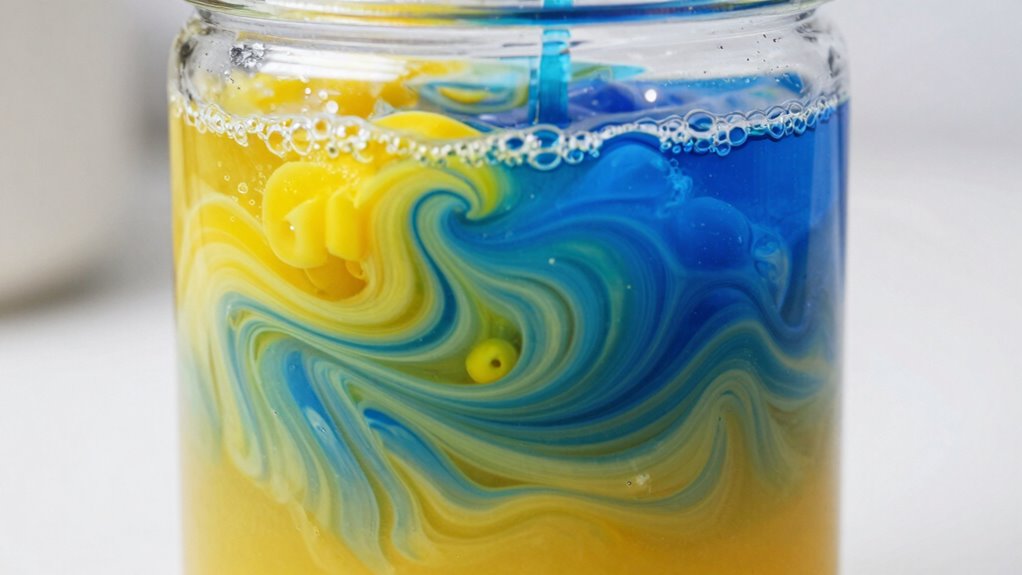
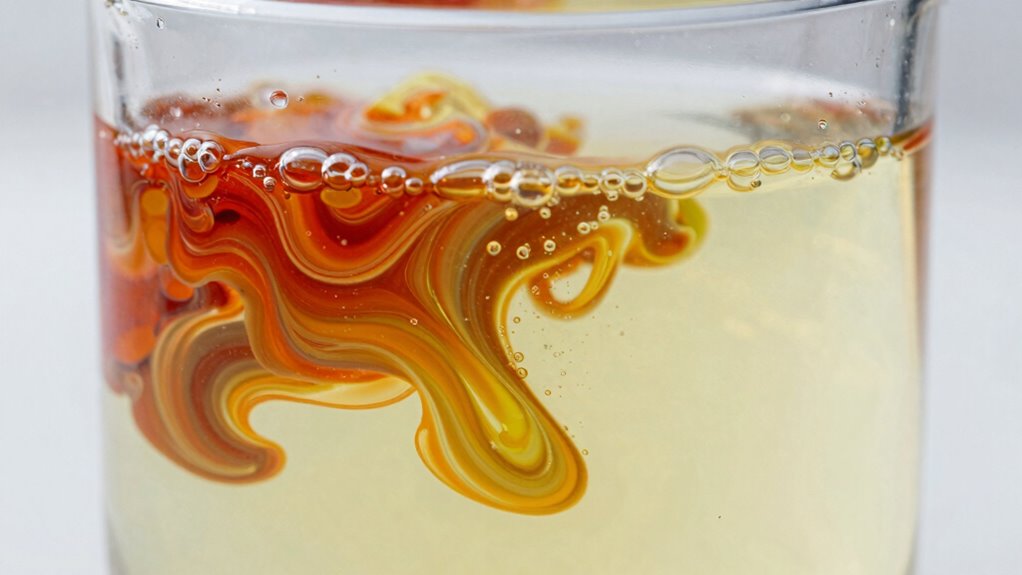
To accurately interpret the jar test results, you need to observe the layer formation carefully. Look for signs of layer separation, which indicates poor compatibility or emulsion instability. If the substances form distinct layers quickly, it suggests they don’t mix well and may cause clogs later. Stable emulsions, on the other hand, stay uniformly dispersed or show minimal separation over time. Pay attention to how long it takes for any separation to occur; rapid separation signals incompatibility. Also, note the appearance of the layers—whether they’re clear or cloudy—since this provides clues about emulsion stability. By carefully monitoring these details, you can determine whether the tank mix will remain uniform or risk forming troublesome clumps.
Note Time and Temperature
Monitoring the time and temperature during the jar test is essential for evaluating compatibility and emulsion stability. Proper temperature control guarantees consistent results, while timing considerations determine when to observe the mixture. To accurately assess outcomes:
- Record the exact start time when mixing begins to track how long the components are combined.
- Keep the temperature stable, ideally within recommended ranges for your products.
- Check the mixture at consistent intervals, such as 15, 30, and 60 minutes, to observe changes.
- Note any signs of clumping, separation, or emulsion breakdown during these intervals.
Record Mixing Outcomes
Recording the outcomes of your jar test is essential for determining whether the mixture is compatible and stable. Carefully observe the sample’s appearance, noting any clumping, separation, or sedimentation. Check for soil compatibility by ensuring the mixture remains uniform without settling or layering. Chemical stability is confirmed if the solution stays clear and doesn’t produce precipitates or gas bubbles. Use the table below to document your findings:
| Observation | Result |
|---|---|
| Clumping or settling | Incompatible or unstable |
| Clear, uniform mixture | Compatible and stable |
| Sediment formation | Soil incompatibility |
| Precipitates or bubbles | Chemical instability |
| Consistent appearance | Suitable for tank mixing |
Accurate record-keeping helps prevent clogs and guarantees safe, effective application.
Troubleshooting Clumping and Fixing Your Tank Mix
Clumping in your tank mix often occurs when ingredients don’t combine properly, leading to uneven application and reduced effectiveness. To troubleshoot, start by checking for chemical incompatibility—certain products just don’t mix well. Next, ensure your equipment calibration is accurate; improper calibration can cause inconsistent mixing. Then, consider the following steps:
- Adjust order of addition to prevent incompatible chemicals from clumping.
- Use proper agitation during mixing to keep ingredients in suspension.
- Conduct a small jar test before full application to observe potential clumping.
- Clean equipment thoroughly between mixes to avoid residues that cause clumps.
Why Regular Jar Testing Saves You Time and Money
Regular jar testing helps you identify potential issues before they become costly problems, saving both time and money. By testing small batches, you can observe chemical reactions and adjust your approach accordingly. This proactive step prevents clumping and clogs in your tank, reducing downtime and repair costs. Proper equipment calibration ensures accurate results, making jar tests more reliable. Here’s a quick overview:
| Step | What to Watch For | Benefits |
|---|---|---|
| Test chemical reactions | Observe mixing, settling, or clumping | Prevents tank issues |
| Calibrate equipment | Ensure accurate measurements | Improves test reliability |
| Adjust formulations | Fine-tune for ideal results | Saves money on chemicals |
| Repeat tests | Verify consistency | Maintains system efficiency |
Regular testing keeps your operations smooth and cost-effective.
Frequently Asked Questions
How Often Should I Perform the Jar Test for Optimal Results?
You should perform the jar test before each new batch of tank mix to verify compatibility. For ideal results, follow a regular testing schedule, especially when changing products or formulations. Frequency recommendations suggest testing whenever you switch chemicals or after long storage periods. By doing this consistently, you prevent clumps and clogs, maintaining efficient application and protecting your equipment from costly damage.
Can Jar Tests Predict Long-Term Compatibility Issues?
Jar tests can help identify potential long-term compatibility issues by revealing chemical reactions that may occur over time. However, they primarily focus on immediate reactions, so they may not fully predict long-term problems. To improve accuracy, you should follow consistent testing protocols, perform periodic tests under different conditions, and monitor for signs of incompatibility over time. Always consider additional lab analysis for extensive long-term compatibility assessments.
Are There Specific Chemicals That Are More Prone to Clumping?
Certain chemicals are more prone to clumping because of their chemical interactions and formulation stability issues. For example, some fertilizers and pesticides with high solubility or that tend to form insoluble compounds can cause clumping. You should pay close attention to these interactions during mixing, as they can diminish effectiveness and cause clogs. Conducting jar tests helps you identify problematic combinations and ensures a smooth, stable tank mix every time.
What Safety Precautions Should I Take During the Jar Test?
You must take safety precautions during the jar test, or risk facing a catastrophe of chemical mishaps! Always wear protective gear—gloves, goggles, and a mask—to shield yourself from splashes and fumes. Conduct the test in a well-ventilated environment, keeping spills contained and avoiding skin contact. Never rush or ignore safety protocols; your safety depends on meticulous precautions, even in a seemingly simple jar test.
How Do Environmental Factors Affect Jar Test Accuracy?
Environmental factors like water temperature and pH fluctuations can markedly impact jar test accuracy. Warmer water speeds up chemical reactions, possibly skewing results, while cooler water slows them down. Sudden pH changes can alter how chemicals interact, leading to inaccurate conclusions. To guarantee precise testing, conduct tests under consistent temperature conditions and monitor pH levels closely, adjusting your procedures if environmental factors vary during testing.
Conclusion
By doing the jar test regularly, you’re playing it smart and avoiding costly clogs and clumps. It’s a small step that can save you big headaches down the line. Don’t let tank mix troubles catch you off guard—think of the jar test as your secret weapon. When you take a little time upfront, you’ll keep your equipment running smoothly and your workday hassle-free. In the end, it’s better to be safe than sorry.