
To winterize your irrigation lines with the blow-out method, you shut off the main water supply, drain residual water, and connect an air compressor to blow out each zone gradually using the recommended pressure. This process removes trapped water that could freeze and cause cracks. Proper execution prevents costly repairs in spring. If you want to make certain your system’s protected and follow correct steps, keep going—detailed tips and precautions await.
Key Takeaways
- Shut off the main water supply and drain residual water from all irrigation components before starting the blow-out.
- Connect a high-pressure air compressor securely to the system and gradually increase pressure within recommended limits.
- Open zone valves sequentially to allow compressed air to blow out remaining water from sprinkler heads and pipes.
- Monitor system pressure and water expulsion to prevent damage and ensure complete removal of residual water.
- Conduct a thorough inspection afterward for leaks or damage, and properly winterize system components to prevent cracking.
Why Proper Winterizing Protects Your Sprinkler System From Freezing Damage
Freezing temperatures can cause serious damage to your sprinkler system if you don’t take proper precautions. When water freezes inside the pipes, it expands, leading to cracks and costly repairs. Proper winterizing safeguards your investment, ensuring your system stays intact through the cold months. Additionally, winterizing supports your landscaping design by preventing damage that could disrupt your yard’s aesthetic and functionality come spring. It also promotes water conservation by avoiding leaks caused by cracks or burst pipes, which can waste significant amounts of water. Understanding the importance of contrast ratio can help you select the right equipment to maintain optimal performance during the winter months. Implementing effective European cloud servers solutions can enhance your system’s reliability and data security even during harsh weather conditions. Proper drainage and system shutdown procedures are crucial components of a comprehensive winterization strategy to prevent residual water from causing damage. Additionally, using advanced irrigation technology can improve your winterization process by providing more precise control over system shutdowns and drainage. Properly maintaining your system with vetted wave and wind considerations can further reduce the risk of damage caused by weather fluctuations. By taking these steps, you protect your system from extreme weather and maintain a healthy, efficient irrigation setup. Ultimately, winterizing helps you save money, preserve your landscape, and ensure your sprinkler system remains reliable year after year.
How the Sprinkler Blow-Out Method Works To Prevent Freeze Cracks
The sprinkler blow-out method effectively prevents freeze cracks by removing all water from your irrigation system before winter. This process ensures that no water remains in pipes, valves, or sprinkler heads, which could freeze and cause damage. To do this effectively, you need to perform proper sprinkler maintenance, including system calibration. Accurate system calibration guarantees that all zones are fully drained, preventing leftover water pockets. Using an air compressor, you blow out each zone starting from the furthest point, ensuring complete removal. This method relies on your understanding of your system’s layout and proper technique. Proper system calibration is essential for optimizing water flow and ensuring thorough drainage during blow-out procedures. By thoroughly clearing water, you reduce the risk of freeze cracks, saving you costly repairs and extending the lifespan of your sprinkler system throughout winter. Incorporating system calibration principles can also help optimize the system’s efficiency and longevity. Additionally, understanding how to identify system components ensures that you target all areas effectively during the blow-out process. Ensuring your system is correctly wired and connected can prevent malfunctions during operation and make the blow-out process smoother.
Preparing Your Sprinkler System For The Blow-Out Process
Before starting the blow-out process, you need to shut off the main water supply to prevent any water flow. Next, drain any remaining water from your system to avoid freezing, and then inspect all components for damage or leaks. Taking these steps guarantees your system is ready for a safe and effective winterization. To ensure your system remains reliable during power outages or emergencies, consider backup power options that can keep your system operational when needed. Proper system maintenance can also help identify potential issues before winter begins, ensuring your sprinkler system functions smoothly year after year. Regular inspection and preventive measures are essential for maintaining optimal performance and avoiding costly repairs.
Shut Off Water Supply
To guarantee a successful blow-out, you need to shut off the main water supply to your sprinkler system. Locate the main valve—often near your water meter—and turn it off completely. This step is vital for preventing water from flowing into the lines during the blow-out process. Before shutting off, check valve maintenance to ensure all control valves are functioning properly, making the process smoother. Additionally, consider removing or insulating exposed pipes to protect against freezing, especially if your system isn’t completely drained. Once the main valve is closed, open the drain valves if available to help release residual water. This ensures your system is fully isolated, reducing the risk of cracks caused by frozen water expanding within the lines. Incorporating hydrotherapy techniques, such as controlled water flow, can further aid in protecting your irrigation system from potential freeze damage.
Drain Remaining Water
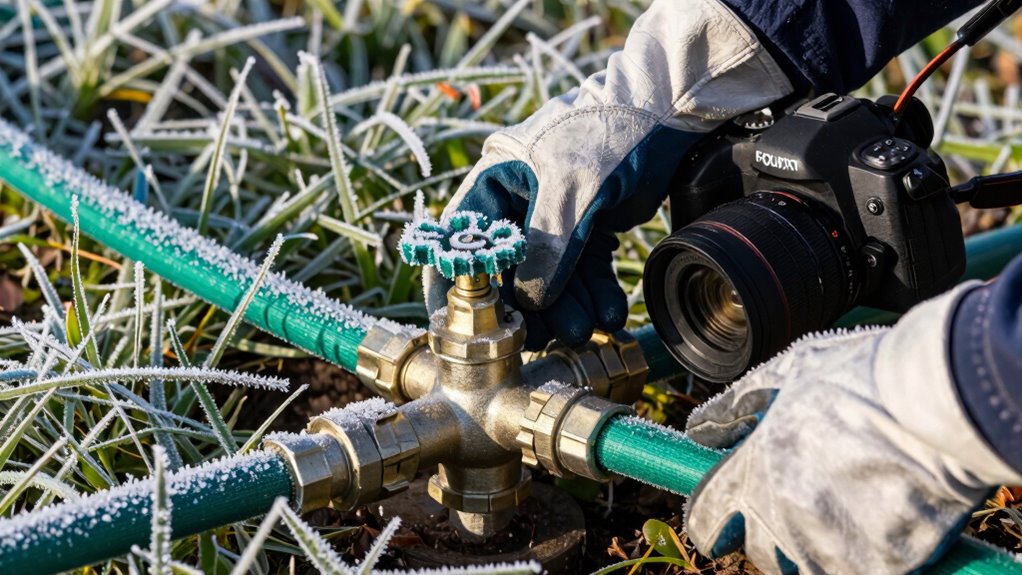
After shutting off the main water supply, it’s essential to drain any remaining water from your sprinkler system to ensure a thorough winterizing process. Draining remaining water helps prevent pipe bursts caused by expanding ice during freezing temperatures. To do this effectively, open all drain valves and zone control valves to release trapped water. If your system doesn’t have automatic drains, use compressed air to blow out residual water from each line. Make sure to inspect each zone to confirm water has fully drained. Removing all water minimizes the risk of cracks and damage caused by ice expansion. Properly draining your system also extends the longevity of your equipment by reducing corrosion and buildup. Additionally, ensuring complete drainage helps avoid system malfunctions when restarting in the spring. Performing a thorough drain also helps to prevent costly repairs caused by ice damage and corrosion over time. Taking this step ensures your sprinkler system is prepared for winter, reducing the chance of costly repairs when the weather warms up again.
Inspect System Components
Inspecting your sprinkler system components guarantees everything is in proper working order before you blow out the lines. Use an inspection checklist to ensure all parts function correctly. Check the backflow preventer, valves, and sprinkler heads for leaks or damage. Make sure the control timer is programmed properly. Confirm that the system’s pressure is adequate and consistent. Inspect for clogged nozzles or broken wires. This step helps identify issues that could cause problems during winterization. Regular system maintenance can extend the lifespan of your sprinkler components and prevent costly repairs. Properly maintaining system components ensures your system operates efficiently during the off-season. Additionally, performing a pressure test can help verify that the system maintains proper pressure levels before winterizing. Taking the time to review component integrity ensures you catch potential problems early, avoiding winter damage.
Step-By-Step Guide To Performing A Sprinkler Blow-Out
To guarantee a successful sprinkler blow-out, you need to prepare your equipment correctly and follow the proper technique. Gathering the right tools and understanding each step helps prevent damage and avoids costly mistakes. Let’s walk through the essential points to keep your system winter-ready. Properly mastering smartphone settings and accessory use can also enhance your experience and ensure your tools work effectively during this process.
Preparing Equipment Properly
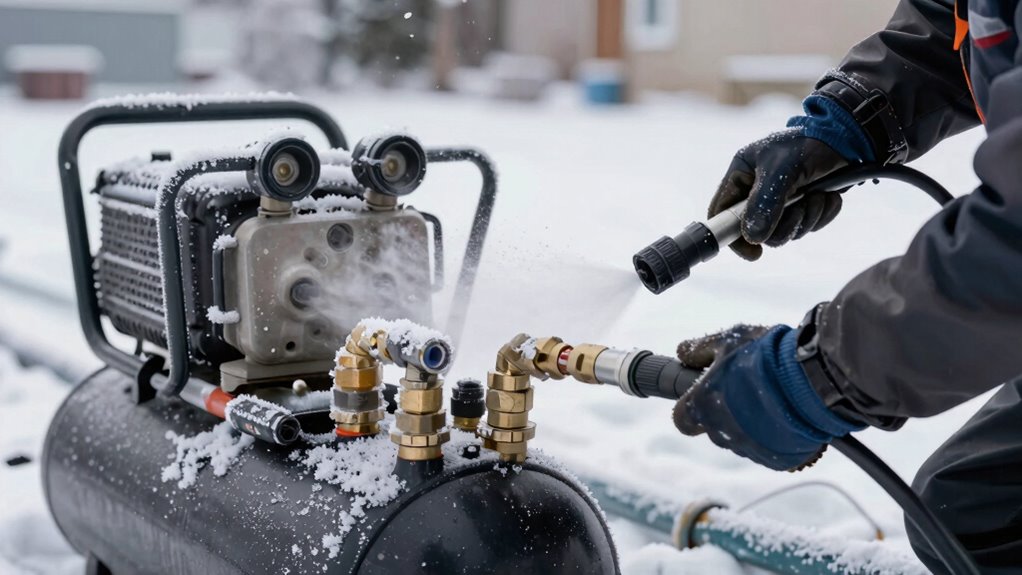
Before you begin the sprinkler blow-out, it’s vital to prepare your equipment to guarantee a smooth and effective process. Start by ensuring your system is properly calibrated for the seasonal shutdown, confirming that all valves and controllers are functioning correctly. Check your compressor or air pump to verify it’s in good working condition and set to the appropriate pressure for your system’s size. Inspect hoses and connections for leaks or damage, replacing or repairing any issues beforehand. Clear any debris or obstructions that could interfere with airflow. Proper preparation minimizes the risk of equipment failure during the blow-out and guarantees you can evacuate all water from the lines efficiently. Taking these steps saves time and helps prevent costly repairs later. Additionally, understanding the fundamentals of irrigation system maintenance ensures you’re equipped to handle routine procedures like the blow-out effectively. Being familiar with support breakfast options can also be beneficial if you plan to work on your system over a longer period and need sustenance.
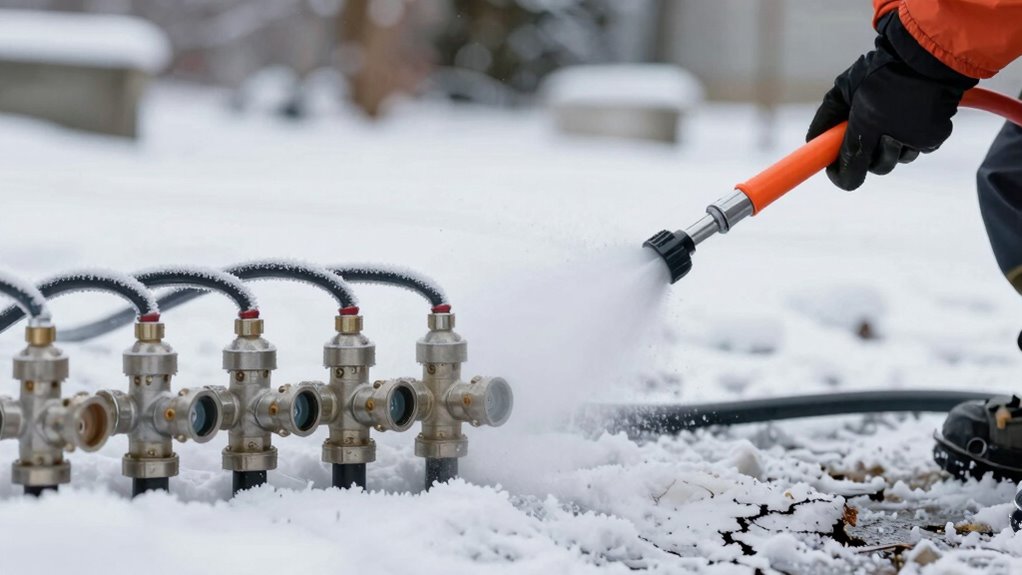
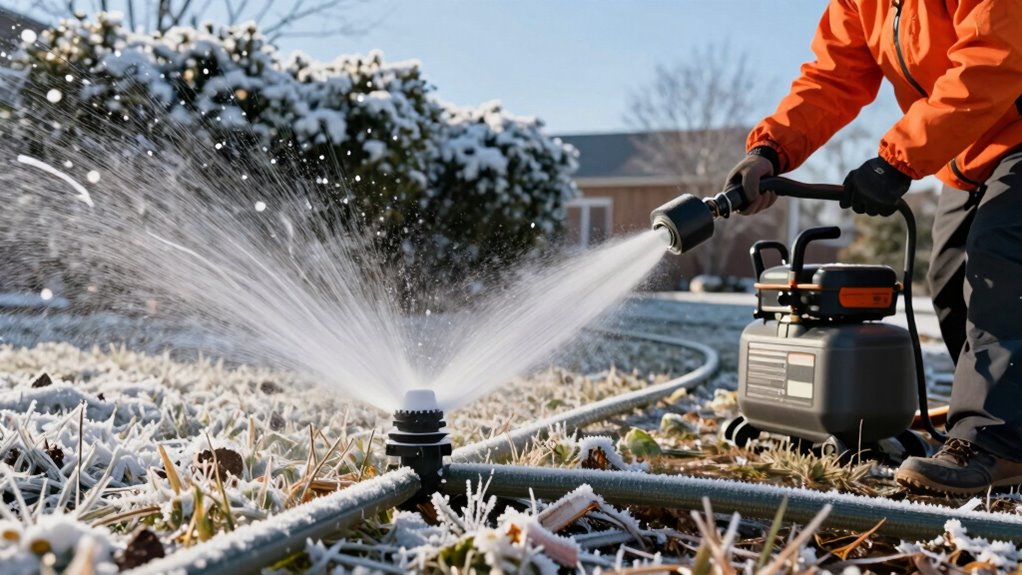
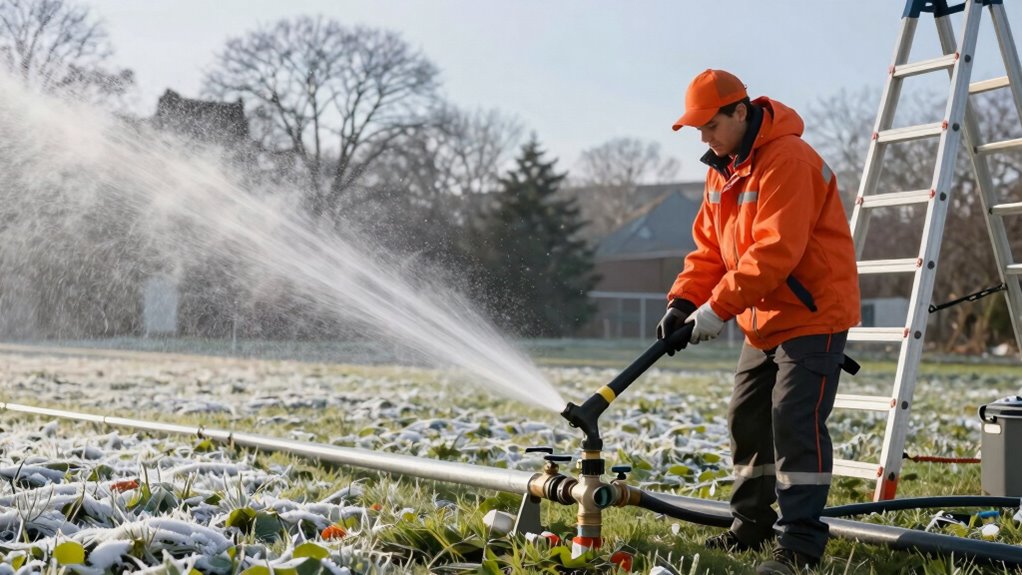
Executing the Blow-Out Technique
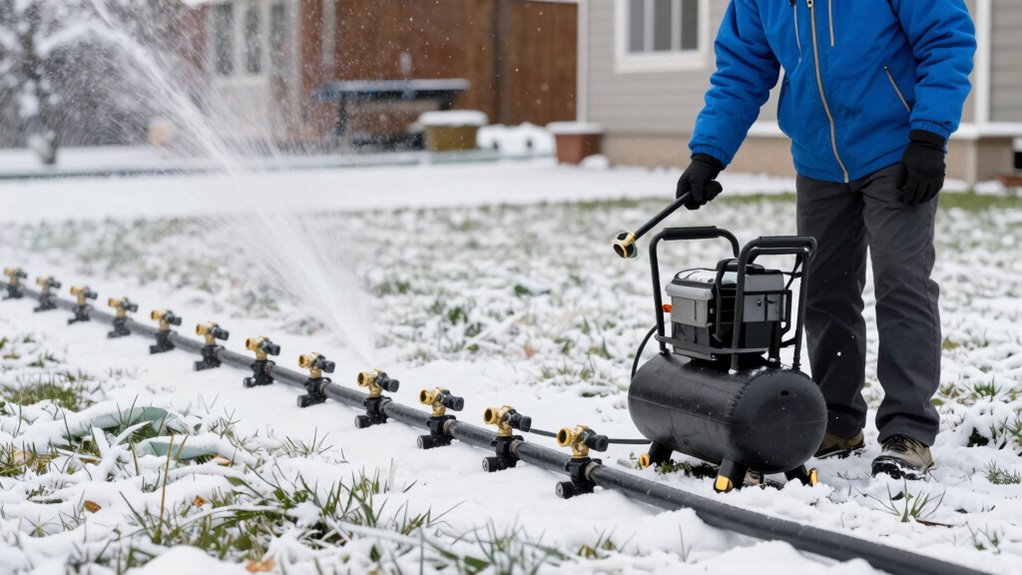
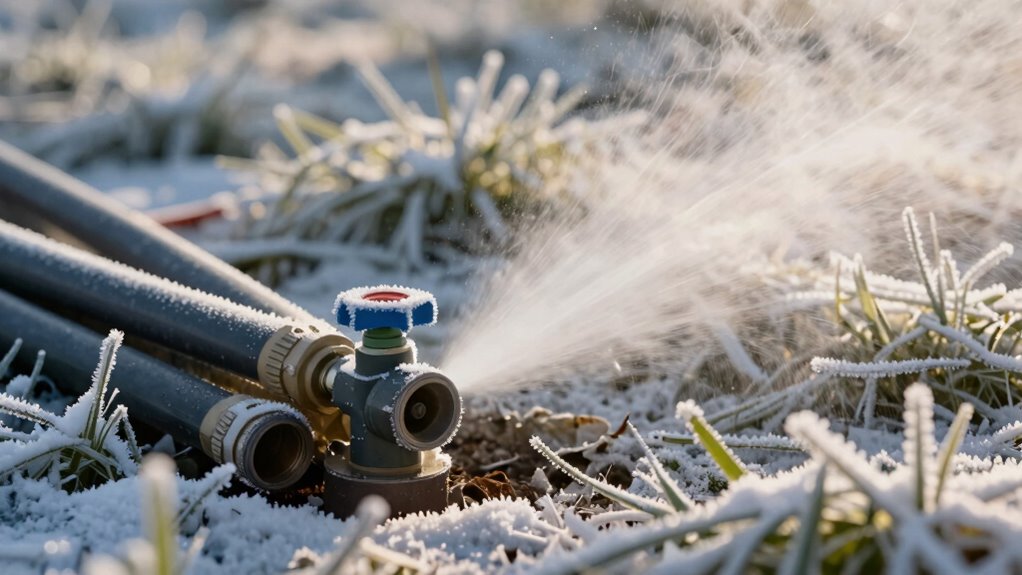
With your equipment properly prepared, it’s time to execute the sprinkler blow-out. Start by opening the compressor valve slowly to build system pressure, ensuring it stays within the recommended range. Next, turn on the compressor and connect it securely to the sprinkler system. As pressure increases, watch for the water to start blowing out of the sprinkler heads. Use the table below to visualize your setup:
| Compressor | Sprinkler System |
|---|---|
| Builds pressure | Releases water |
| Connects securely | Heads blow out |
| Maintains steady pressure | Clears lines |
| Monitors pressure | Ensures valve maintenance |
| Shuts off when complete | System winterized |
Constantly monitor system pressure and valve maintenance to prevent damage while guaranteeing a thorough blow-out.
Common Mistakes To Avoid When Winterizing Your Sprinkler System
One common mistake homeowners make when winterizing their sprinkler system is rushing the process or skipping steps altogether. This can lead to exposed pipes or trapped water, increasing the risk of freezing damage. Ignoring proper procedures also introduces common hazards and DIY risks, which can cause costly repairs or system failure. To avoid these issues, don’t overlook these key points:
- Failing to drain all zones thoroughly
- Using incorrect air pressure during the blow-out
- Neglecting to remove backflow preventers
- Skipping a final inspection for leaks or remaining water
- Failing to maintain proper air pressure during the blow-out process
Rushing or skipping steps increases the likelihood of mistakes that can damage your system. Taking your time and following each step carefully minimizes hazards and ensures your irrigation lines stay protected through winter.
When To Call A Professional For Sprinkler Blow-Out Service
Knowing when to call a professional for sprinkler blow-out service can save you time, effort, and prevent costly damage. If you notice persistent sprinkler system leaks during winter, it’s a sign you might need expert help to ensure the system is properly cleared. Seasonal landscape changes, like new planting beds or altered sprinkler zones, can complicate the blow-out process and increase the risk of incomplete winterization. If you’re unsure about how to disconnect backflow preventers or if your system has complex zoning, a professional can ensure everything is thoroughly blown out. Relying on experts also minimizes the chance of cracks caused by trapped water or improper pressure. Ultimately, calling a professional guarantees your system is winterized correctly, protecting your investment for years to come.
Post-Winter Maintenance Tips To Get Your System Ready For Spring

As winter ends and the weather warms, it’s essential to prepare your irrigation system for spring use. Start by examining for any damage or leaks, ensuring all components are in good shape to support your garden design. Clean out filters and check sprinkler heads for proper alignment, which promotes efficient water use. Adjust your system’s timing to match seasonal needs, helping with water conservation. Additionally, replace worn parts and consider installing rain sensors to prevent overwatering. Proper maintenance now prevents issues later and ensures your system runs smoothly during peak growing season.
- Inspect for damage or leaks
- Clean filters and sprinkler heads
- Adjust watering schedules for spring
- Add water-saving devices like rain sensors
Frequently Asked Questions
Can I Winterize My Sprinkler System Myself or Should I Hire a Professional?
You can winterize your sprinkler system yourself, but be aware of DIY risks like damaging pipes if you don’t do it correctly. Hiring a professional offers benefits such as expert knowledge, proper equipment, and peace of mind that your system is winterized properly. If you’re comfortable with the process, follow safety guidelines carefully. Otherwise, investing in a professional guarantees your system stays protected from winter damage.
What Tools and Equipment Are Necessary for the Sprinkler Blow-Out Process?
Did you know over 60% of sprinkler system failures occur due to improper winterization? For the blow-out process, you’ll need a compressor with at least 50 CFM, a set of quick-connect fittings, and an air blow-out adapter. Keep tools overview and equipment maintenance in mind—ensure your compressor is in good condition and all fittings are secure. Proper tools make winterizing easier and help prevent costly repairs.
How Long Does the Winterizing Process Typically Take?
The winterizing process usually takes about 30 minutes to an hour, depending on your system size and experience. Timing considerations are key, so you should plan seasonal planning around the first hard freeze. Starting early guarantees you have enough time to complete the blow-out method thoroughly, preventing water from freezing and causing cracks. Rushing can lead to missed spots, so allocate ample time for a proper winterization.
Are There Specific Signs Indicating My System Needs Winterization?
You should winterize your system if you notice signs like frost damage or system leaks, especially during colder months. Frost damage can cause cracks in your pipes, leading to costly repairs, while leaks may indicate trapped water that can freeze and expand. Address these signs promptly by winterizing your irrigation lines, preventing potential cracks and ensuring your system stays in good condition through winter.
How Often Should I Perform Winterization to Ensure System Longevity?
You should perform winterization annually, ideally in late fall before the first freeze. Regular seasonal maintenance, including a thorough system inspection, helps catch potential issues early. By doing this every year, you guarantee your irrigation system stays in good condition and prevents costly repairs caused by frozen pipes. Consistent winterization and inspections maintain system longevity, saving you time and money while keeping your landscape healthy through the colder months.
Conclusion
By winterizing your irrigation lines with the blow-out method, you’re fundamentally wrapping your system in a warm blanket before the cold arrives. Think of it as guiding your sprinkler system safely through a winter slumber, preventing cracks like icy tears. With careful preparation and the right technique, you’ll wake up next spring to a healthy, happy sprinkler system. So, embrace the process—your yard’s future self will thank you for safeguarding its green beauty.