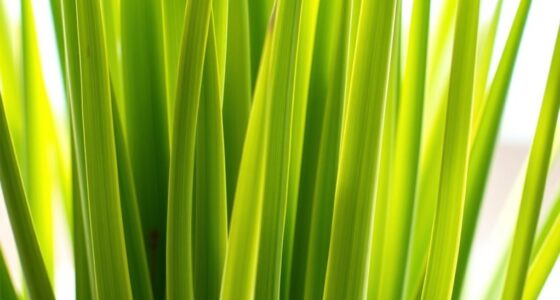
To rescue your hydrangea, first check your watering schedule—water deeply when the top inch of soil feels dry, but avoid overwatering or waterlogged soil. Remove any damaged or dead leaves, and prune overgrown branches to improve airflow. Inspect for pests or disease signs like spots or webbing, and treat accordingly. Guarantee the plant gets morning sun and afternoon shade, and consider improving drainage with mulch. Continuing past this point, you’ll discover more ways to restore your hydrangea’s health.
Key Takeaways
- Check soil moisture and water deeply if the soil feels dry to prevent dehydration.
- Inspect leaves and stems for pests, disease signs, or damage and treat promptly.
- Remove affected or wilted leaves to improve airflow and reduce disease risk.
- Ensure the plant is in proper light conditions—morning sun with afternoon shade.
- Review support structures and prune overgrowth to alleviate stress and promote healthy growth.
Assess Watering Habits and Adjust Accordingly
If your hydrangea leaves are wilting and turning brown, it’s essential to evaluate your watering habits. Start by reviewing your watering schedule to confirm you’re providing consistent moisture without overwatering. Hydrangeas need soil that remains evenly moist, so check moisture levels regularly by feeling the soil about an inch deep. If it feels dry, it’s time to water thoroughly. On the other hand, if the soil stays soggy or waterlogged, you may be overwatering, which can cause root problems leading to leaf browning. Adjust your watering schedule accordingly—water deeply when the top inch of soil feels dry, and avoid frequent shallow watering. Maintaining proper moisture levels helps your hydrangea stay healthy and prevents stress that causes wilting and browning. Additionally, understanding the plant’s watering needs is crucial for preventing issues related to improper moisture levels. Proper watering practices are also supported by lifestyle strategies that promote overall plant health.
Check for Signs of Pests and Disease

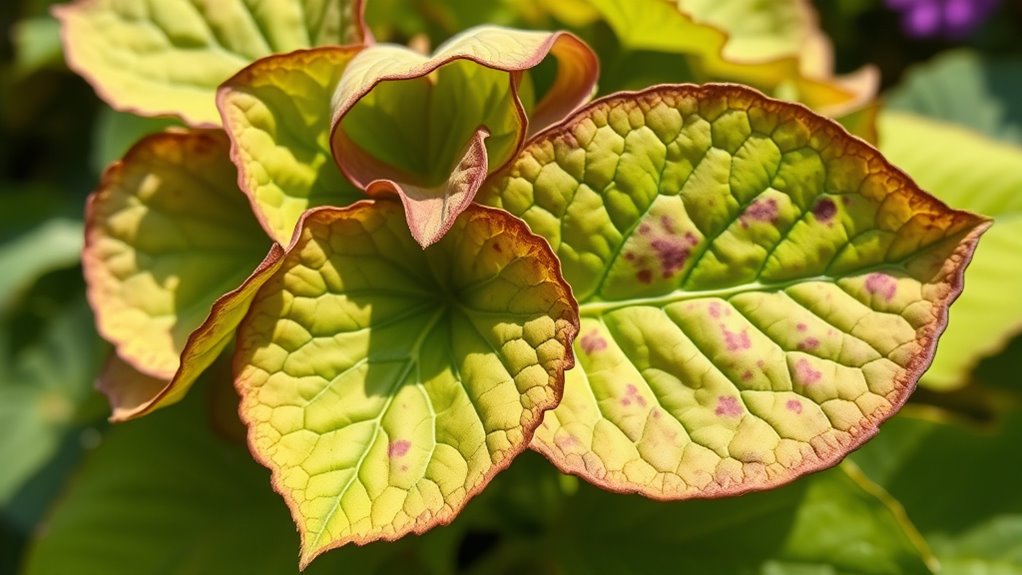
Inspect your hydrangea closely for signs of pests like aphids or spider mites, which can cause leaf damage. Look for telltale symptoms such as sticky residue, webbing, or discolored spots on the leaves. Recognizing these early helps you take quick action to protect your plant from further harm. Being aware of plant health indicators can also assist in identifying underlying issues affecting your hydrangea. Monitoring for disease symptoms such as leaf spots or mold can help prevent more serious problems. Additionally, understanding pest identification can aid you in choosing the most effective treatment options.
Pest Identification Tips
To identify pests and diseases affecting hydrangea leaves, start by closely examining the plant for visible signs of trouble. Look for tiny insects like aphids, spider mites, or scale on the undersides of leaves and stems. Check for discolored, sticky, or deformed leaves, which can indicate pest activity. Look for webbing, especially near leaf joints, a sign of spider mites. Use your fingers or a magnifying glass to spot small pests or eggs. Proper pest identification is vital for selecting effective pest control techniques. If you notice pests, act quickly to prevent damage. Regular inspection helps catch problems early and guarantees you choose the right treatment, whether using natural predators or targeted insecticides. Accurate pest identification is key to saving your hydrangea. Additionally, understanding how automation in business can streamline pest management strategies may help in efficiently addressing infestations.
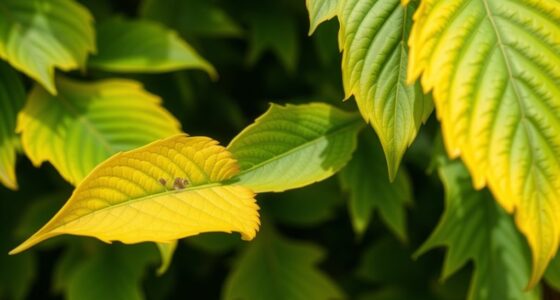
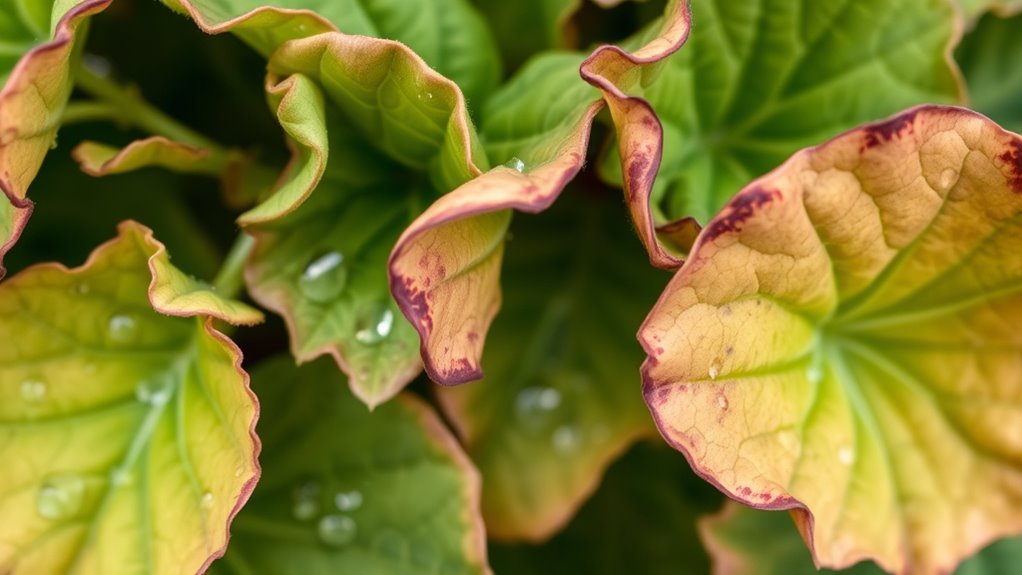
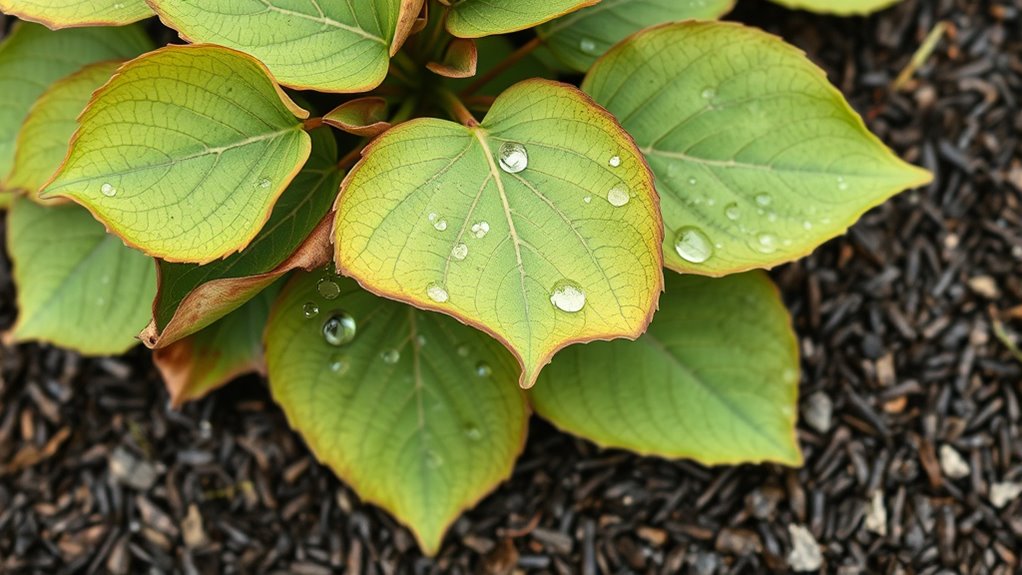
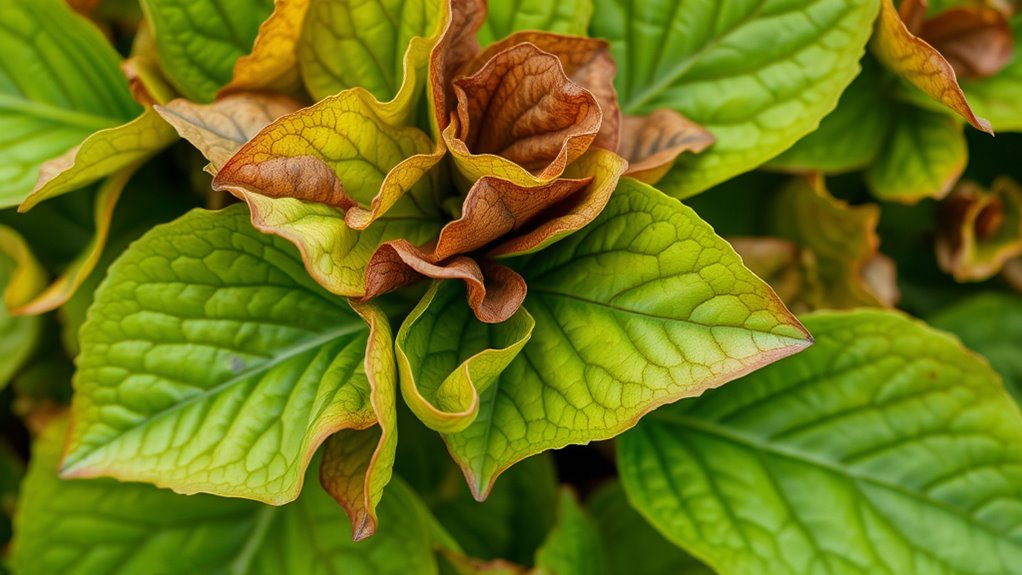
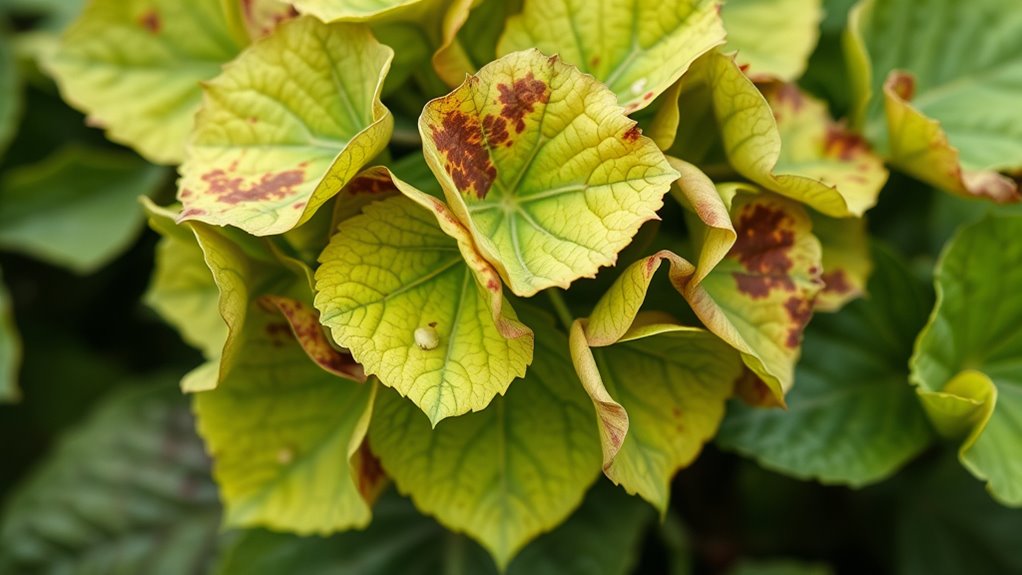
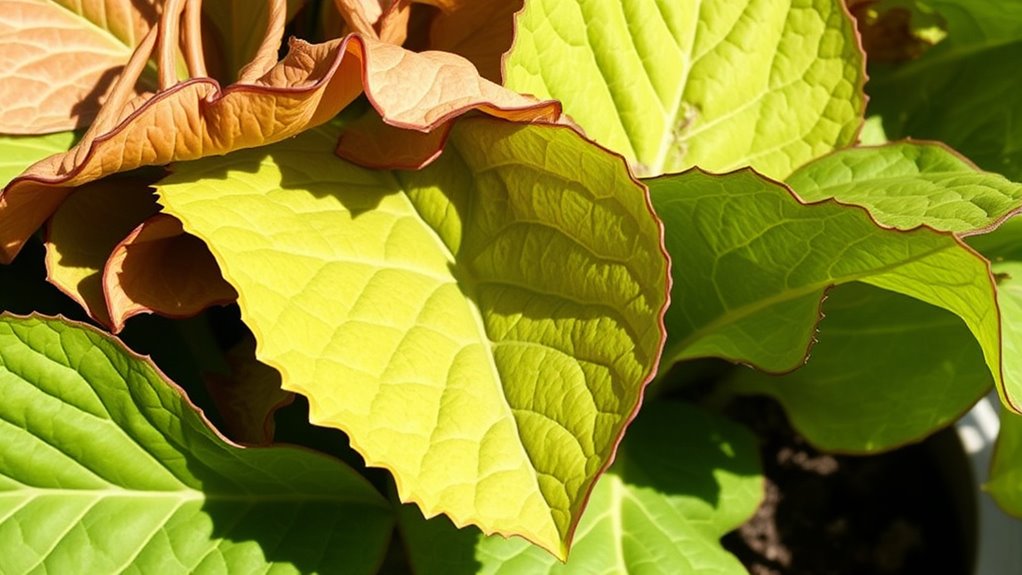
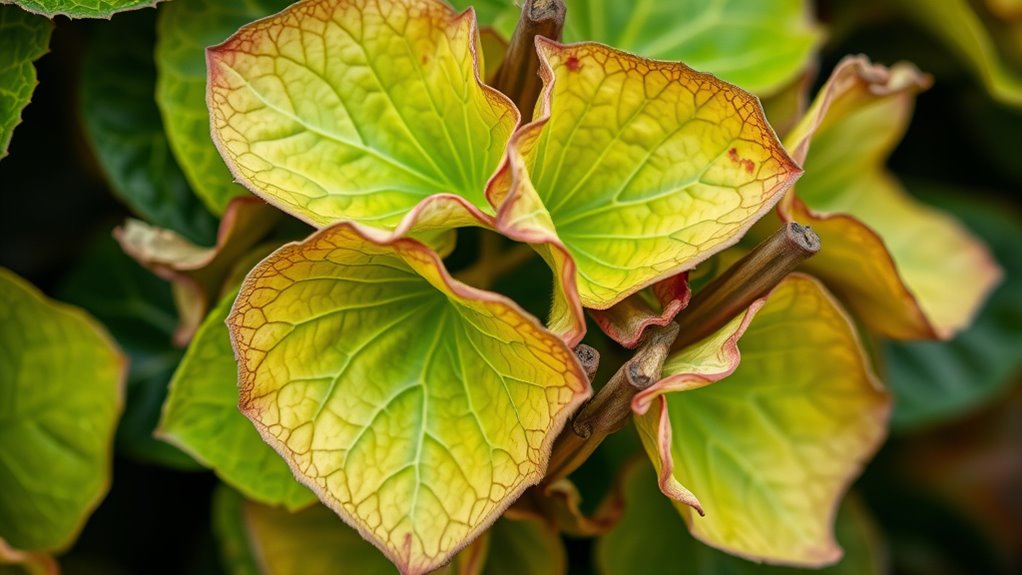
Disease Symptoms to Watch
Careful observation of your hydrangea leaves can reveal early signs of disease that may be causing wilting and browning. Look for discolored spots, powdery residue, or fuzzy patches, which indicate fungal infections. You might also notice holes or chew marks from pests. Using pest resistant varieties can help prevent infestations. Keep an eye out for wilting despite proper watering, which signals possible root rot or fungal issues. Early detection allows for prompt treatment, such as removing infected leaves or applying fungicides. Preventing fungal infection is essential to maintaining healthy plants. Here’s a quick guide:
| Symptom | Possible Cause |
|---|---|
| Discolored spots | Fungal infection |
| Powdery residue | Powdery mildew |
| Fuzzy patches | Fungal growth |
| Holes or chew marks | Pest activity |
| Wilting with healthy leaves | Root or fungal issues |
A thorough understanding of disease symptoms can help you take immediate action to save your hydrangea, especially by considering integrated pest management strategies to prevent future problems. Additionally, maintaining proper air circulation around your plant can significantly reduce the risk of fungal development.
Improve Soil Drainage and Mulching Techniques
Improving soil drainage is essential to prevent hydrangea leaves from wilting and browning, especially during heavy rain or inconsistent watering. To achieve this, enhance soil aeration by loosening compacted soil and mixing in organic matter. Incorporate compost layering around the base of your hydrangea to improve water absorption and retain necessary moisture without waterlogging. Mulching also helps regulate soil temperature and prevents crusting, which can impede drainage. Use mulch that allows excess water to escape while retaining enough moisture for healthy roots. Regularly check the soil’s drainage capacity and adjust your techniques as needed. Proper soil aeration combined with strategic compost layering creates an environment where your hydrangea roots can breathe and absorb water efficiently, reducing stress and promoting vibrant foliage.
Prune Damaged and Overgrown Foliage
Start by removing any dead leaves to keep your hydrangea healthy and tidy. Trim overgrown branches to prevent crowding and encourage better growth. Shape the plant to improve airflow, which helps reduce disease and keeps your hydrangea thriving. Additionally, proper pruning techniques can stimulate new, healthy growth and enhance flowering in the next season plant maintenance practices. Regular pruning also promotes better air circulation, which is crucial for preventing fungal infections. Ensuring your hydrangea receives appropriate watering techniques helps prevent stress and further leaf damage.
Remove Dead Leaves
Removing dead leaves from your hydrangea is an essential step to keep the plant healthy and promote new growth. Dead or decaying foliage can hinder soil aeration around the roots, leading to poor nutrient uptake and increased risk of disease. As you prune, focus on leaves showing discoloration, wilting, or damage—these are signs they no longer serve the plant. Clearing away dead leaves improves airflow and light penetration, reducing the chances of fungal issues. Be careful not to remove healthy foliage unnecessarily, as this can stress the plant. Regularly removing dead or damaged leaves encourages vigorous growth, helps the plant recover from stress, and keeps your hydrangea vibrant and lush. This simple step supports overall health and resilience, especially when combined with proper plant care practices. Using self watering plant pots can also help maintain consistent moisture, reducing stress on the plant during recovery. Additionally, removing dead leaves can prevent the spread of plant diseases and promote stronger, healthier stems.
Trim Overgrown Branches
When your hydrangea’s branches become overgrown or damaged, it’s important to prune them to maintain the plant’s shape and health. Proper pruning techniques help prevent disease and promote healthy growth. Start by identifying dead, broken, or diseased branches, and remove them with clean cuts. Use branch trimming to control size and shape, ensuring good airflow and sunlight penetration. Additionally, incorporating crochet styles for locs can serve as a creative way to protect your hair after pruning, promoting healthy hair growth. Here are key steps to follow:
- Use sharp, clean pruning tools to make precise cuts.
- Cut back overgrown branches to just above a healthy bud or node.
- Remove crossing or rubbing branches to avoid damage.
- Avoid over-pruning, which can weaken the plant.
- Understanding plant health can help you identify issues early and maintain a thriving hydrangea.
Following these pruning techniques will keep your hydrangea vibrant and thriving.
Shape for Airflow
Pruning damaged and overgrown foliage helps shape your hydrangea for better airflow and sunlight exposure. When you trim back the leaf shape that’s cluttered or damaged, you improve airflow patterns around the plant. This reduces humidity buildup and minimizes disease risk, which can cause leaves to wilt or turn brown. Proper pruning techniques are essential for maintaining healthy growth and preventing issues caused by poor airflow. Focus on removing leaves and stems that are crossing, overlapping, or blocking airflow, especially those with irregular or misshapen leaf shapes. Clearing out this excess foliage creates space for fresh air to circulate freely, promoting healthier growth. Properly shaped hydrangeas allow sunlight to reach more leaves, aiding in overall vigor. Regular pruning of damaged and overgrown foliage ensures your hydrangea maintains conducive airflow and stays healthier in the long run. Additionally, maintaining good airflow can help prevent juice detox side effects like mold or fungal issues that thrive in stagnant, humid conditions. Incorporating knowledge about plant health maintenance can further support the long-term vitality of your hydrangea.
Inspect and Reinforce Support Structures
Since sturdy support structures are essential for healthy hydrangeas, it’s important to regularly inspect them for signs of damage or instability. A weak or broken support can compromise plant stability, leading to wilting or browning leaves. To guarantee your hydrangea stays strong:
- Check for leaning or sagging stems that indicate support failure.
- Look for broken or cracked supports that need repair or replacement.
- Tighten or replace loose ties securing the plant to its support.
- Remove any debris or pests that may weaken the structure.
Apply Appropriate Fertilizer and Nutrients

Choose a balanced fertilizer to give your hydrangea the nutrients it requires. Apply it during growth spurts when the plant shows signs of active development. This guarantees healthy leaves and vibrant blooms while preventing wilting and browning.
Select Balanced Fertilizer
Selecting the right balanced fertilizer is essential to reviving your hydrangea’s health. Start by conducting soil testing to determine nutrient deficiencies and pH levels. Use organic amendments like compost or well-rotted manure to improve soil quality naturally. Choose a fertilizer with a balanced ratio, such as 10-10-10 or 12-12-12, to supply nitrogen, phosphorus, and potassium evenly. Consider applying slow-release fertilizers to prevent overfeeding and runoff. Regularly monitor your plant’s response, adjusting nutrients as needed. Proper fertilization encourages healthy leaf growth and prevents wilting and browning. Remember, soil testing guides you to tailor your fertilization plan, ensuring your hydrangea gets exactly what it needs for vibrant, lush foliage.
Apply During Growth Spurts
Applying the right fertilizer during your hydrangea’s growth spurts guarantees it receives the nutrients needed for robust development. During these periods, it’s essential to modify your pruning techniques to promote healthy growth and airflow, which helps prevent disease. Proper fertilization supports vigorous leaf and flower production, so use a balanced fertilizer suited for hydrangeas. Keep your watering schedule consistent; adequate moisture enhances nutrient absorption and prevents wilting or brown leaves. Avoid over-fertilizing, which can lead to nutrient burn, and ensure you apply fertilizer evenly around the base of the plant. Regularly monitor your plant’s response and adjust feeding as needed. By synchronizing fertilization with growth spurts, pruning, and watering, you’ll foster a strong, healthy hydrangea that resists wilting and browning.
Ensure Proper Sunlight Exposure

Ensuring your hydrangea receives the right amount of sunlight is essential for healthy leaves and vibrant blooms. Proper sunlight exposure helps prevent wilting and browning. To optimize your plant’s sunlight requirements, consider these tips:
- Place your hydrangea in a location with morning sun and afternoon shade for balanced light.
- Use pruning techniques to remove excess branches that block sunlight from reaching inner leaves.
- Avoid full sun during peak hours, especially in hot climates, to prevent leaf scorch.
- Regularly assess sunlight patterns and adjust your plant’s position if needed.
Handle Root Damage and Repot if Necessary
If you notice persistent wilting or browning despite proper sunlight, root damage might be the cause. Carefully examine the roots by gently removing the plant from its pot. Look for blackened, mushy, or broken roots, which indicate root damage. If you find significant issues, you’ll need to perform a repotting process. Start by trimming away the damaged roots with clean, sharp scissors. Use fresh, well-draining soil and a slightly larger pot if needed. This helps the plant recover and prevents further stress. Make certain the roots are spread out evenly and the plant sits at the same depth as before. Proper handling during the repotting process encourages healthy root growth, boosting your hydrangea’s chances of recovery.
Maintain Consistent Care Routine
Maintaining a consistent care routine is essential for keeping your hydrangea healthy and preventing issues like wilting and browning leaves. A stable schedule guarantees your plant receives proper attention and care. Here are four key steps to follow:
- Regularly test your soil to ensure proper pH and nutrient levels, adjusting as needed.
- Stick to a consistent watering schedule, watering deeply when the top inch of soil feels dry.
- Mulch around the base to retain moisture and regulate soil temperature.
- Observe your hydrangea daily for signs of stress or pests, adjusting care routines accordingly.
Monitor and Prevent Future Stress Factors
Regularly monitoring your hydrangea helps catch stress factors early before they cause significant damage. Check soil moisture frequently and adjust watering accordingly to prevent drought stress or waterlogging. Incorporate soil amendments like compost or organic matter to improve drainage and nutrient availability, fostering a healthy root system. Keep an eye out for pests such as aphids or spider mites; early pest prevention involves removing affected foliage and applying natural repellents or insecticidal soap. Regular inspection also allows you to identify signs of disease or nutrient deficiencies early. By staying vigilant, you can address issues promptly, reducing the likelihood of wilting and browning. Consistent monitoring and proactive prevention create a resilient environment that keeps your hydrangea thriving and minimizes stress-related problems.
Frequently Asked Questions
Can Overwatering Cause Hydrangea Leaf Wilting Even With Proper Watering?
Overwatering can cause hydrangea leaf wilting even if your watering seems proper. Excess water leads to watering stress, suffocating roots and preventing oxygen flow. This root damage weakens the plant’s ability to absorb nutrients and water, causing leaves to wilt and turn brown. So, it’s essential to strike a balance—watering enough to keep the soil moist but not soggy—to prevent root damage and keep your hydrangea healthy.
What Are the Most Common Pests That Affect Hydrangea Leaves?
Imagine you notice tiny holes and speckled leaves on your hydrangea—that’s likely pest infestation causing insect damage. Common pests include aphids, which suck sap and weaken your plant, leading to leaf discoloration. You’ll want to inspect your hydrangea regularly, identify the pests early, and treat with insecticidal soap or neem oil. Addressing pest infestation promptly prevents further insect damage and keeps your hydrangea healthy.
How Do Soil Ph Levels Influence Hydrangea Leaf Health?
Soil pH levels greatly influence your hydrangea’s leaf health by affecting soil acidity and nutrient balance. If the soil is too acidic or too alkaline, your plant may struggle to absorb essential nutrients, leading to wilting or browning leaves. To promote healthy foliage, test your soil regularly and adjust the pH as needed, ensuring ideal nutrient availability. Proper soil management keeps your hydrangea vibrant and thriving.
Are There Specific Pruning Techniques to Prevent Leaf Browning?
Imagine giving your hydrangea a gentle whisper of care. To prevent leaf browning, you should prune at the right moment—preferably in late winter or early spring—using proper tools like sharp shears. This careful timing and precise cutting help remove damaged or overgrown branches, promoting healthy growth. Regular, thoughtful pruning encourages lush, vibrant leaves, ensuring your hydrangea remains a stunning centerpiece without the worry of browning edges.
How Can I Identify Early Signs of Disease Before Leaves Wilt?
To spot early signs of disease, watch for leaf discoloration that appears uneven or spots that develop quickly. Check for stem softness, which indicates possible rot or infection. You might notice leaves curling or drooping before wilting happens. Regularly inspecting your hydrangea helps you catch issues early, so you can act promptly and prevent further damage. Staying vigilant guarantees your plant stays healthy and vibrant.
Conclusion
By balancing watering, battling pests, and boosting soil, you’ll breathe new life into your hydrangea. Regularly prune, protect, and preserve to prevent problems from proliferating. Keep a keen eye on sunlight, support, and stress factors to sustain healthy stems and stunning blooms. With consistent care and clever correction, your hydrangea will flourish, free from fading foliage. Remember, patience and persistence propel your plant’s progress, turning wilting woes into wonderful, vibrant blooms worth the wait.