To successfully plant a plumeria cutting, select a healthy, mature branch at least 12 inches long with firm, disease-free growth. Let the cut end dry in a shaded area for a few days before applying rooting hormone. Use a well-draining pot with cactus or succulent soil and plant the cut end slightly above the soil surface. Place in bright, indirect sunlight and water weekly. For detailed tips on nurturing your plumeria, keep exploring these steps.
Key Takeaways
- Select a healthy, mature cutting with multiple nodes and allow it to callus before planting.
- Use a well-draining soil mix and a pot with drainage holes for optimal root development.
- Plant the callused cutting upright, dip in rooting hormone, and keep in bright, indirect sunlight.
- Water weekly, avoid overwatering, and fertilize every 4-6 weeks with a high-phosphorus fertilizer.
- Maintain warm temperatures, prune regularly, and monitor for pests to ensure healthy growth.
Choosing the Perfect Plumeria Cutting
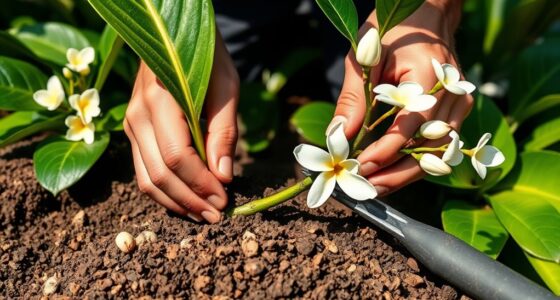
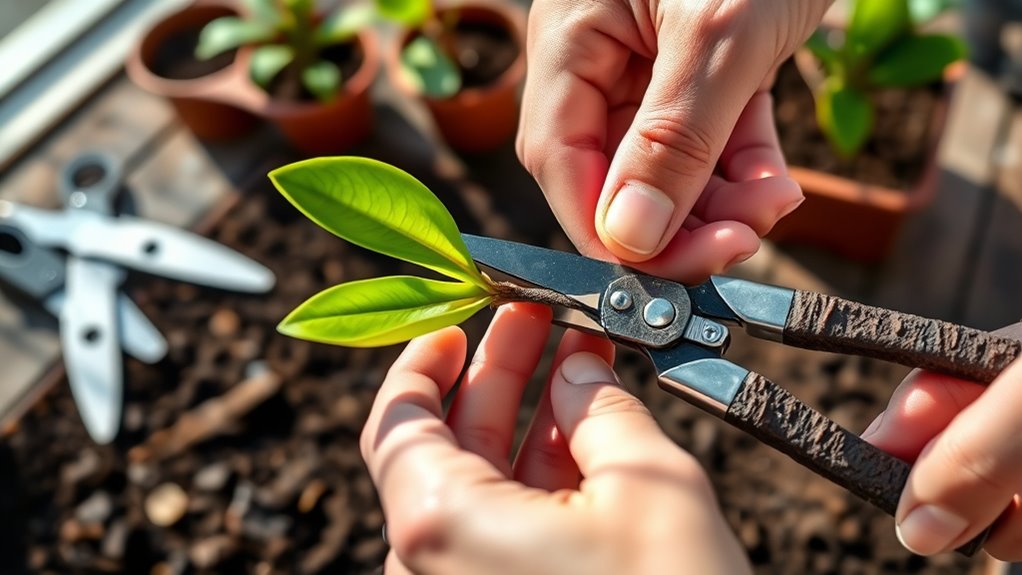
When selecting a plumeria cutting, it is vital to choose a healthy, mature branch that is free from disease or damage. Look for a stem that’s at least 12 inches long with several nodes, as these are essential for successful rooting. Your propagation methods will rely on effective rooting techniques, such as using well-draining soil or a rooting hormone to encourage faster root development. Avoid branches with signs of rot, pests, or cracks, since these can hinder growth. Opt for a cutting with a healthy, firm appearance. Proper selection guarantees a higher success rate during propagation, and it helps your new plumeria establish strong roots quickly. Additionally, understanding plant propagation methods can significantly improve your success rate. Being aware of water requirements is also crucial to ensure your new plant thrives once established. For best results, consider the climate conditions suitable for plumeria to ensure vigorous growth.
Preparing the Cutting for Planting
First, pick a healthy, disease-free cutting with strong growth. Next, carefully remove excess leaves to reduce moisture loss and stress. Finally, let the cut end dry and form a callus before planting to prevent rot.
Choose a Healthy Cutting
Select a healthy, mature plumeria branch that has at least two to three inches of firm, green growth. This guarantees you’re starting with a vigorous cutting capable of rooting successfully. Use proper pruning methods to remove any dead or damaged tissue, which helps prevent disease and encourages healthy root development. When choosing your cutting, look for a branch that’s free of pests and disease signs. The cutting should be sturdy and flexible, not brittle. For rooting techniques, a clean, sharp knife or pruning shears work best to make a clean cut. Properly prepared cuttings increase your chances of success, so take your time selecting the best possible branch to give your plumeria the strongest start. Additionally, selecting a healthy growing environment with proper soil and light conditions can significantly improve the likelihood of successful rooting.
Remove Foliage Properly
After choosing a healthy, vigorous cutting, the next step is to remove excess foliage. Proper foliage removal helps the plant focus energy on root development and prevents rot. Use sharp, clean pruning tools for clean cuts. When pruning, follow good techniques to avoid damaging the stem. Additionally, ensure the cutting is free from any pests or diseases to promote healthy growth and reduce the risk of infection. Pruning techniques can enhance healing and overall plant vitality. To further support the plant’s health, consider the storage conditions of your cutting to maintain its freshness and reduce stress during rooting. Being aware of market trends can also help you time your planting for optimal growth conditions.
Allow for Callus Formation
Allowing the cutting to form a callus is a crucial step before planting. Callus formation occurs as part of the healing process, helping the wound seal and preventing infection. After trimming the cutting, place it in a dry, shaded area with good air circulation. This pause allows the cut end to develop a callus, which typically takes a few days to a week. During this time, the cut surfaces dry out and form a protective layer. Proper wound healing can significantly improve the success rate of rooting your plumeria cutting. Ensuring proper ventilation during this period helps prevent excess moisture that could lead to rot or disease. Skipping this step can increase the risk of rot or disease once planted. Be patient and resist the urge to plant immediately. Proper callus formation ensures your plumeria cutting has a stronger, healthier start, setting the stage for successful rooting and growth. Natural materials like well-draining soil and clean tools further support healthy propagation.
Selecting the Ideal Pot and Soil Mix

Choosing the right pot and soil mix is vital for your plumeria’s growth. You should pick a pot with proper size and drainage to prevent water from pooling, and use a soil that promotes healthy roots. Ensuring enough root space and proper drainage helps your cutting establish strong, vibrant growth. Additionally, selecting a soil with good aeration and proper watering needs supports healthy development. It is also beneficial to consider contrast ratio when choosing your soil, as it can influence the visual health of your plant through color and light reflection. Furthermore, paying attention to soil composition can help ensure your plumeria receives the nutrients it needs for optimal growth.
Choosing the Right Pot Size
Selecting the right pot size is essential for your plumeria cutting’s successful root development. If the pot is too small, roots can become cramped, hindering growth. Too large, and excess soil may retain moisture, risking rot. Aim for a pot that provides adequate root space without overwhelming your plant.
Consider these tips:
- Choose a pot just slightly larger than the root ball
- Ensure it has drainage holes for proper water flow
- Use a lightweight material like terracotta or plastic
- Avoid deep pots if your root system is shallow
- Using the right soil mix can also improve drainage and promote healthy growth which is crucial for plant health.
A well-sized pot encourages healthy root expansion while preventing overwatering. Remember, the goal is to give your plumeria enough space to grow strong without leaving excessive soil moisture that could cause problems.
Soil Composition and Drainage
To guarantee your plumeria cutting establishes healthy roots, focusing on soil composition and drainage is essential. You want a mix that promotes soil aeration and drainage efficiency, preventing waterlogging and root rot. Use a well-draining soil blend, such as cactus or succulent mix, combined with perlite or coarse sand. This ensures excess water escapes quickly, maintaining proper moisture levels.
| Soil Components | Purpose |
|---|---|
| Organic matter | Provides nutrients and retains moisture |
| Perlite or sand | Improves aeration and drainage efficiency |
Choosing the right soil mix helps your plumeria develop strong roots and thrive in its new environment. Avoid heavy, clay-based soils that hinder water flow and aeration.
Ensuring Proper Root Space
Ensuring proper root space is essential for your plumeria cutting to grow strong and healthy. Choosing the right pot helps provide adequate root space and promotes good pot drainage. A pot that’s too small can restrict growth, while one that’s too large may retain excess water and cause root rot. Look for a container with drainage holes to prevent water from pooling. Select a pot that’s slightly bigger than the root ball, allowing room for growth. When planting, ensure the soil mix is loose and well-draining to support healthy roots. Proper root space encourages strong development and minimizes disease risk.
- Use a pot with drainage holes
- Pick a size slightly larger than the root ball
- Avoid overly large containers that retain excess moisture
- Ensure the soil mix promotes good aeration
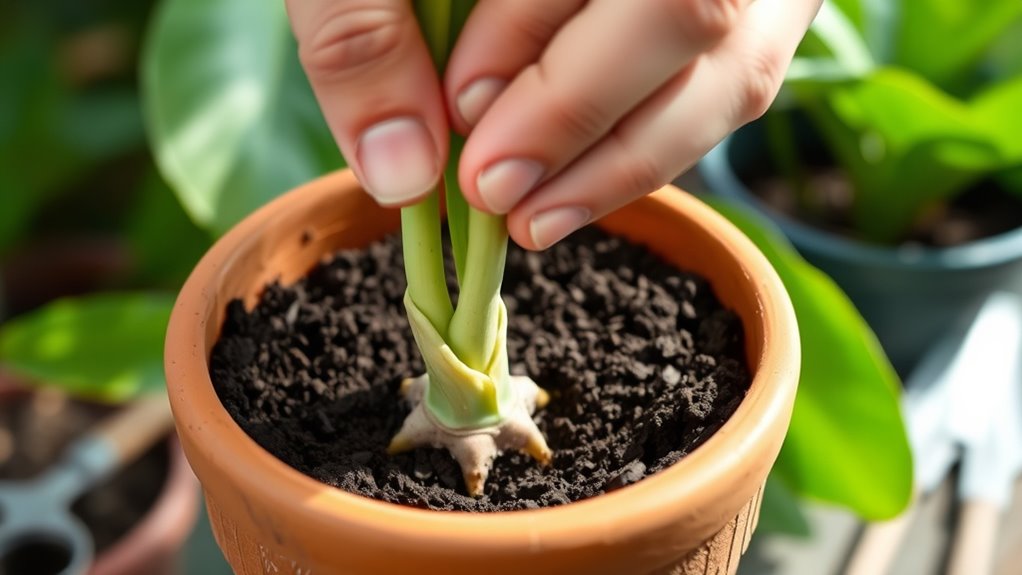
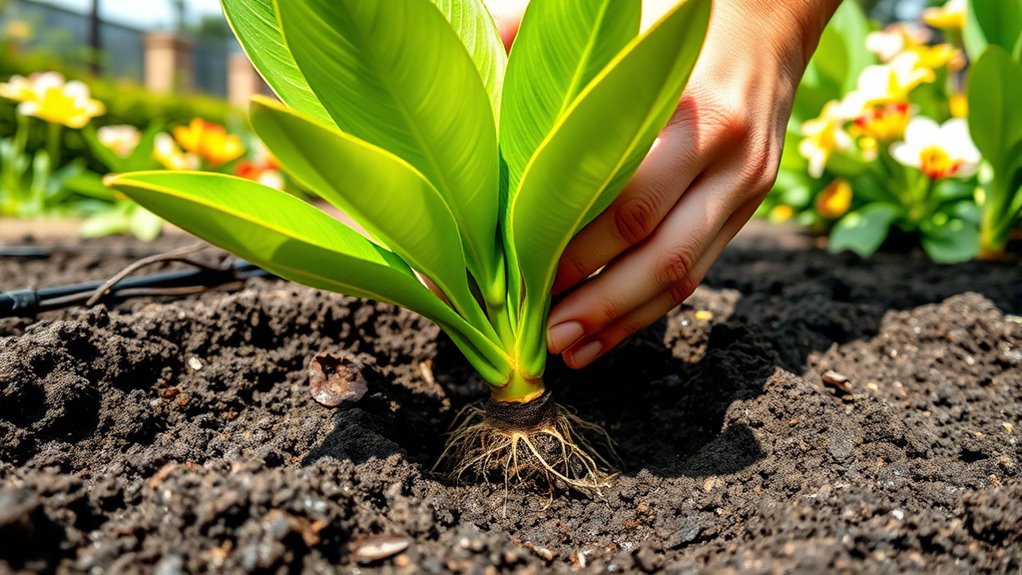
Planting the Cutting Properly
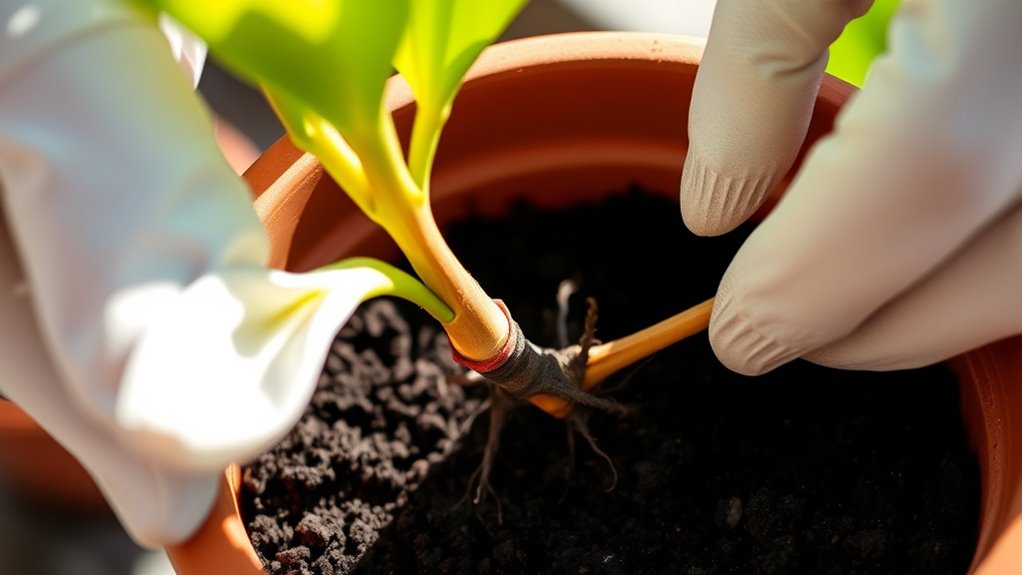
Plant the plumeria cutting into a well-draining soil mix, making sure the roots are positioned comfortably and upright. Dip the cut end in a rooting hormone to encourage faster root development. Gently place the cutting into the soil, ensuring it’s deep enough for stability but not buried too deeply. Use pruning techniques beforehand to remove any damaged or diseased parts, promoting healthy growth. Firmly press the soil around the cutting to eliminate air pockets and provide support. Be careful not to overpack the soil, as good drainage is essential. Keep the top of the cutting slightly above the soil line to prevent rot. Proper planting sets a strong foundation for successful rooting and future growth. Additionally, using portable gardening tools can make the planting process easier and more efficient. To optimize your planting success, consider workspace organization to keep your tools and materials within reach and maintain a clean workspace.
You can also consider using self watering plant pots, which help maintain consistent moisture levels during the rooting process, increasing the likelihood of success.
Providing the Right Environmental Conditions
Providing the right environmental conditions is essential for your plumeria cutting to thrive. Ensuring proper light requirements and temperature control helps promote healthy root growth and vibrant foliage. Place your cutting where it can receive bright, indirect sunlight—aim for at least 6 hours daily. Avoid direct, harsh sun that can scorch tender leaves. Keep the temperature steady between 65°F and 80°F; avoid drafts or sudden temperature drops. To make this easier, consider these tips:
- Find a warm, sunny spot indoors or in a sheltered outdoor area
- Use a grow light if natural light is limited
- Maintain consistent temperatures, avoiding cold drafts
- Use a thermometer to monitor temperature stability
- Recognizing angel number soulmate patterns can help you better understand the growth signals from your environment
- Regularly inspect your environment for air quality issues that could hinder healthy growth and address them promptly
- Monitoring soil moisture levels ensures your cutting receives adequate hydration without becoming waterlogged
These steps create an ideal environment for your plumeria to establish and flourish.
Watering and Fertilizing Your Plumeria
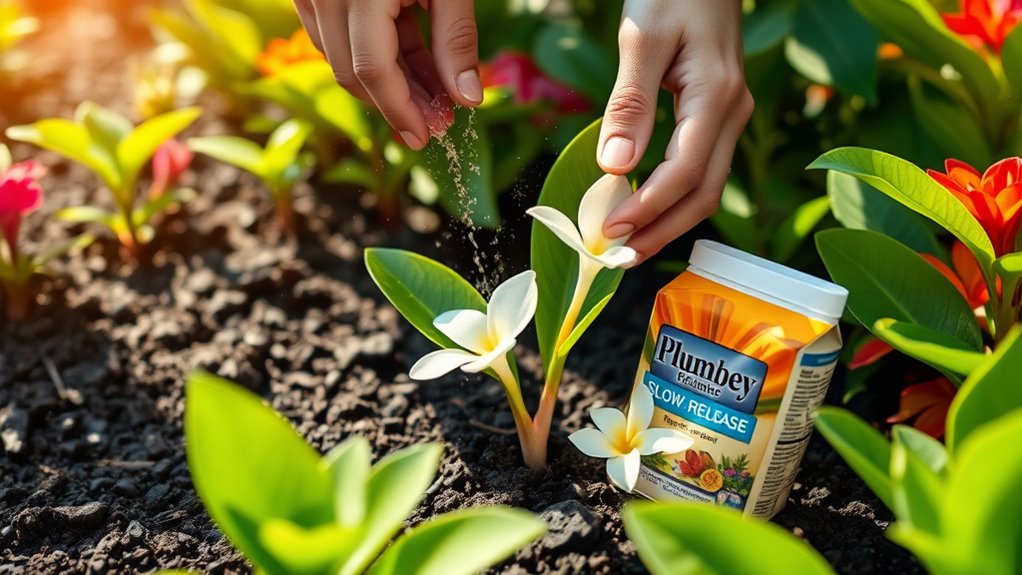
Watering and fertilizing your plumeria correctly is essential for healthy growth. Establish a consistent watering schedule, allowing the soil to dry out slightly between waterings to prevent root rot. During the active growing season, water deeply once a week; reduce frequency in cooler months. Use fertilization techniques that provide balanced nutrients, such as a high-phosphorus fertilizer, every 4-6 weeks. Avoid over-fertilizing, which can cause excessive foliage growth at the expense of flowers. When fertilizing, dilute the fertilizer to prevent burning the roots. Keep an eye on your plant’s response—yellowing leaves or slow growth may indicate the need to adjust your watering or fertilization approach. Proper watering and fertilizing guarantee your plumeria remains healthy and vibrant.
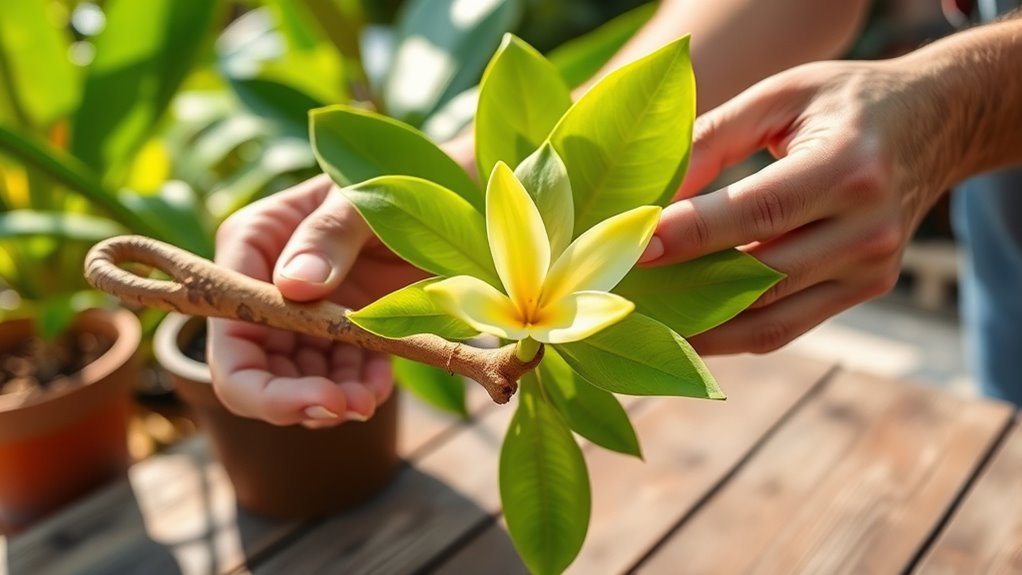
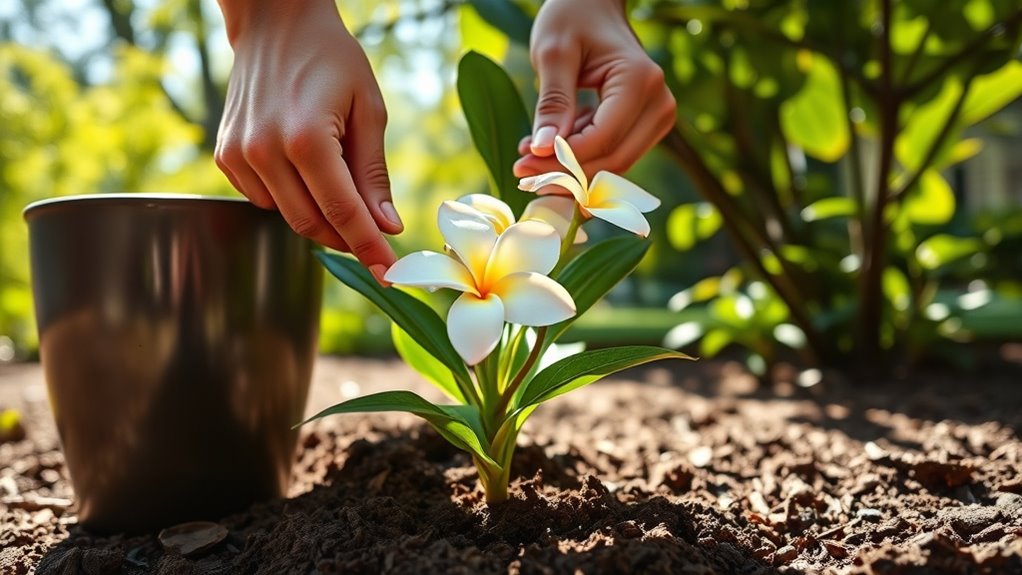
Caring for Your Growing Plumeria Tree
Once your plumeria begins to thrive with proper watering and fertilizing, it’s important to focus on its ongoing care as it grows taller and fuller. Regular pruning techniques help shape your tree and promote healthy growth. Use sharp, clean tools to trim back dead or crossing branches, encouraging better airflow and reducing disease risk. Keep an eye out for pests like spider mites or aphids; early pest control prevents infestations from spreading. Maintain good hygiene by removing fallen leaves and debris. Ensure your plumeria gets adequate sunlight, as this boosts flower production and overall health. Monitoring your tree regularly allows you to catch problems early and keep it vibrant and strong for years to come.
Frequently Asked Questions
How Long Does It Take for a Plumeria Cutting to Bloom?
You’re wondering how long it takes for a plumeria cutting to bloom. Typically, with proper care, you’ll see flowers within 1 to 2 years, depending on your plant’s growth rate and environmental conditions. The flowering timeline varies based on sunlight, watering, and fertilization. Be patient and consistent, and your plumeria will reward you with beautiful blooms once it reaches maturity, usually around that 12-24 month mark.
Can I Grow Plumeria Indoors Successfully?
You can grow plumeria indoors successfully if you meet its light requirements and provide proper indoor cultivation. Believe it or not, plumeria loves bright, direct sunlight, so place it near a south-facing window. With adequate warmth and occasional watering, your indoor plumeria can thrive and even bloom. Just guarantee good drainage and avoid overwatering, and you’ll enjoy this tropical beauty inside your home year-round.
What Are Common Pests and Diseases Affecting Plumeria?
You should be aware that common plumeria pests include spider mites, aphids, and mealybugs, which can damage your plant. Fungal diseases like root rot also pose risks. To prevent these issues, regularly inspect your plant, keep it healthy, and guarantee proper drainage. Disease prevention involves avoiding overwatering, maintaining good air circulation, and promptly treating any pest infestations to keep your plumeria thriving.
How Do I Propagate Plumeria From Seed Instead of Cuttings?
Think of it as hitting two birds with one stone—you can propagate plumeria from seed and enjoy natural propagation. To start, soak the seeds in water for 24 hours, then plant them in well-draining soil about half an inch deep. Keep the soil moist and place the container in bright, indirect sunlight. With patience, seed germination occurs within a few weeks, leading to new plumeria plants growing from seed.
When Is the Best Time of Year to Plant a Plumeria Cutting?
The best time of year for seasonal planting of a plumeria cutting is during warm months when temperatures stay above 65°F, typically late spring to early summer. This is the ideal timing because warmth encourages root growth and minimizes risk of cold damage. You want to plant when the weather is stable, giving your cutting a strong start. Avoid planting in cooler or rainy seasons to ensure successful growth.
Conclusion
With patience and proper care, you can successfully grow a stunning plumeria from a cutting. Did you know that plumerias can bloom within just a year of planting? By choosing the right cutting, preparing it well, and providing ideal conditions, you’ll be rewarded with fragrant, vibrant flowers. Keep nurturing your plant, and you’ll enjoy its beauty and sweet scent for years to come. Happy planting!