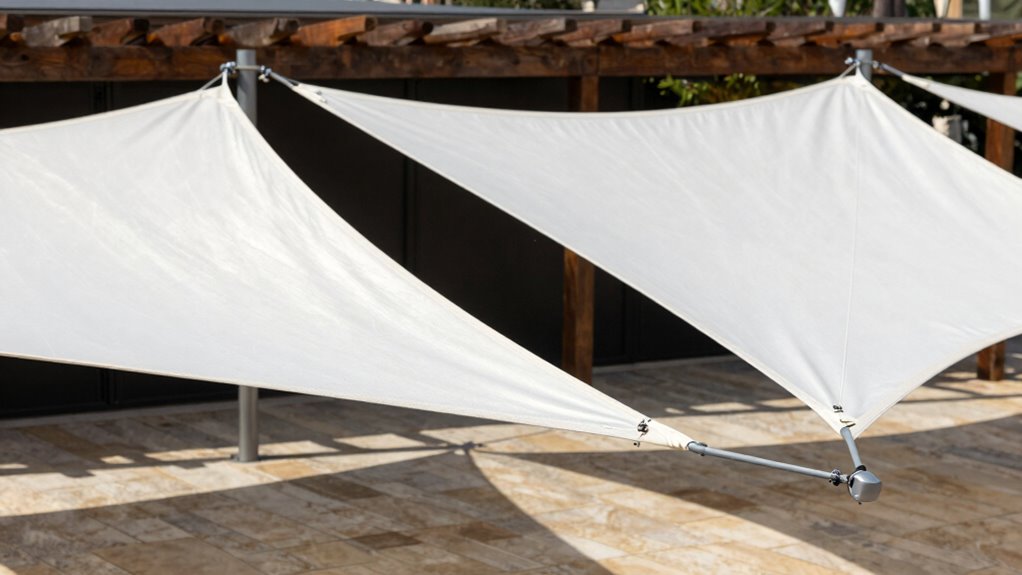

Proper tensioning is vital to keeping your shade sail durable and looking great. If you don’t tighten it correctly, it can sag or tear over time, leading to costly repairs. Loose fabric flaps in the wind, while over-tightening strains the material and hardware. To prevent this, you need to understand proper techniques and tools for even tensioning. Keep your shade sail in top shape and discover how to avoid common mistakes by exploring these essential tips.
Key Takeaways
- Improper initial tensioning, either too loose or too tight, leads to sagging and increased tear risk.
- Failing to evenly tension all corners causes uneven stress and fabric deterioration.
- Using low-quality hardware or incorrect attachment points weakens tension and accelerates fabric failure.
- Neglecting regular re-tensioning as weather conditions change results in sagging and damage.
- Over-tightening during installation strains fabric and hardware, causing tears and reducing lifespan.

HYASIA Shade Sail Hardware Kit with Ratchet Winch, Heavy Duty 304 Stainless Steel Windproof Sun Shade Tension Kit for Rectangle Triangle Canopy, For Outdoor Patio Garden Vendor(Winch + 4Pcs Wire Rope)
Heavy Duty 304 Stainless Steel with Ratchet Winch : HYASIA shade sail hardware kit ratchet winch set is…
As an affiliate, we earn on qualifying purchases.
As an affiliate, we earn on qualifying purchases.
Why Proper Shade Sail Tensioning Is Key to Longevity

Proper tensioning of your shade sail is essential because it directly impacts its durability and lifespan. When you properly tension the sail, you reduce unnecessary stress on the fabric, helping it resist wear and tear over time. Fabric selection plays a role here—choose durable, high-quality materials designed to withstand tension without stretching or sagging prematurely. Additionally, correct tensioning minimizes excessive movement that could cause uneven fading, especially in vibrant colors. If the sail is too loose, it can flap in the wind, accelerating fabric degradation and leading to quicker color fading. Conversely, overly tight tension can strain the fabric and hardware. Striking the right balance ensures your shade sail remains attractive and functional for years, preserving both its appearance and longevity. Proper tensioning also enhances the fabric’s color fidelity, ensuring vibrant colors stay vivid longer. Regularly checking and adjusting tension helps maintain optimal fabric tension, preventing long-term damage. Implementing a routine inspection process can help catch issues early and extend the life of your shade sail, especially by monitoring stress points that may develop over time.
yofit 44 Pcs Shade Sail Hardware Kit 6 Inch Outdoor Sun Sail Accessories
All-in-One Sun Shade Sail Hardware Kit: Our complete shade sail hardware kit includes everything you need for easy…
As an affiliate, we earn on qualifying purchases.
As an affiliate, we earn on qualifying purchases.
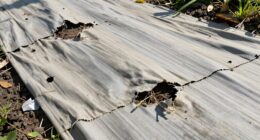
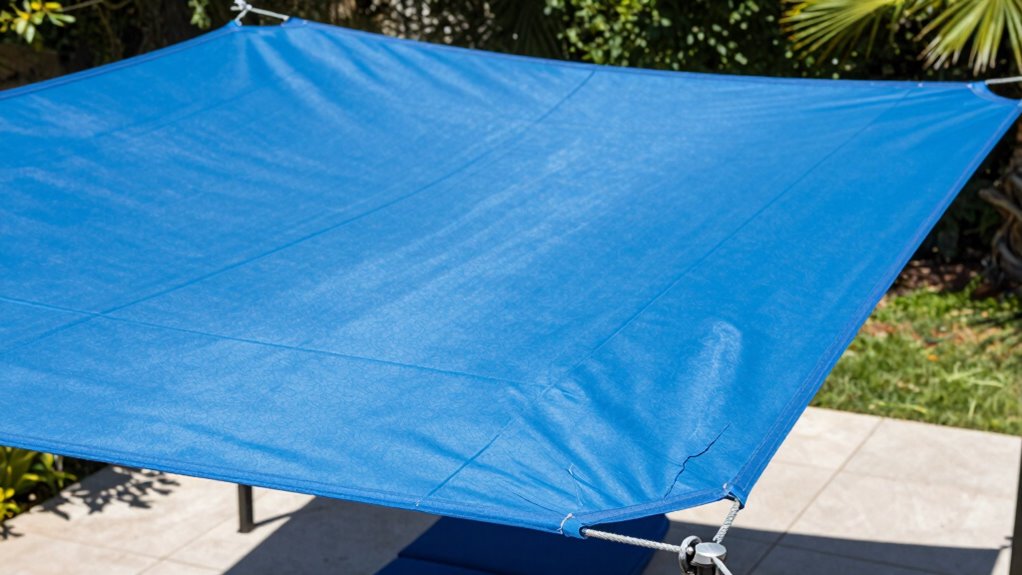
Signs Your Shade Sail Is Sagging or Tearing

Over time, even well-tensioned shade sails can show signs of wear that indicate it’s time for adjustments or repairs. One clear sign is sagging, which can be caused by fabric stretching or improper tension. Tearing or small holes in the fabric also signal stress points, often from excessive tension or poor fabric selection. Additionally, pay attention to color fading, which suggests prolonged sun exposure and weakening fabric integrity. If your shade sail no longer maintains its tautness or shows visible tears or faded areas, it’s a sign that the fabric may need replacing or re-tensioning. Regularly inspecting these signs helps prevent further damage and ensures your shade sail continues providing effective, long-lasting shade. Being aware of proper tensioning techniques is essential to avoid common issues like sagging and tearing, especially since fabric durability can vary based on material quality and installation methods. Proper installation and material selection are crucial for maximizing the lifespan of your shade sail and preventing premature deterioration. Additionally, understanding installation best practices can help ensure your shade sail remains secure and functional over time.

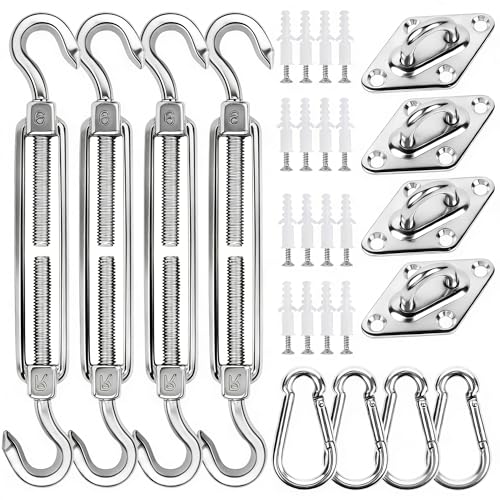
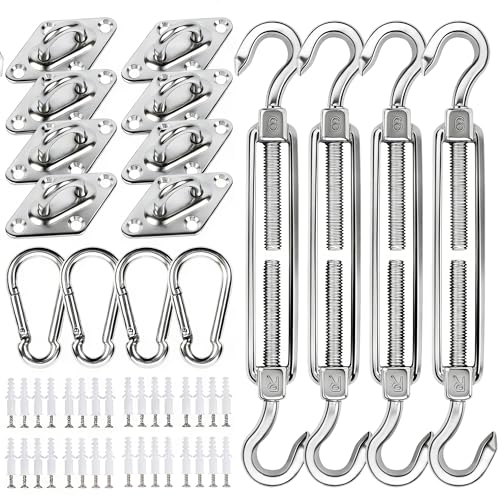
Turnbuckle Lsqurel 10PCS 304 Stainless Steel Turnbuckle Hook and Eye Heavy Duty M4 M6 M8 M10 Tensioner Adjustable Shade Sail Hardware for Tightening up Metal Cable Wire 5/32 1/4 5/16 3/8
PRODUCT SPECIFICATIONS: M6 (1/4") turnbuckle hook & eye, max length 8.4 inch, min length 5.9 inch, adjustable length:…
As an affiliate, we earn on qualifying purchases.
As an affiliate, we earn on qualifying purchases.
How to Achieve Perfect Shade Sail Tension

To get your shade sail perfectly tensioned, start by placing your anchors correctly to guarantee stability. Use a consistent tension technique to keep the fabric taut without over-tightening. Remember, overdoing it can cause damage, so aim for just enough tension to avoid sagging. Proper tensioning also helps prevent premature tears and extends the lifespan of your shade sail fabric durability. Ensuring proper tension is a key aspect of smart design that promotes long-lasting, comfortable outdoor living spaces. Additionally, understanding the importance of easy document management can help you organize your outdoor gear and maintenance records for your shade sail efficiently. Regular inspections and adjustments can further maintain optimal tension and prolong the life of your shade sail long-term performance. Paying attention to inner guidance during installation can help you make better decisions that align with your specific outdoor environment.
Proper Anchor Placement
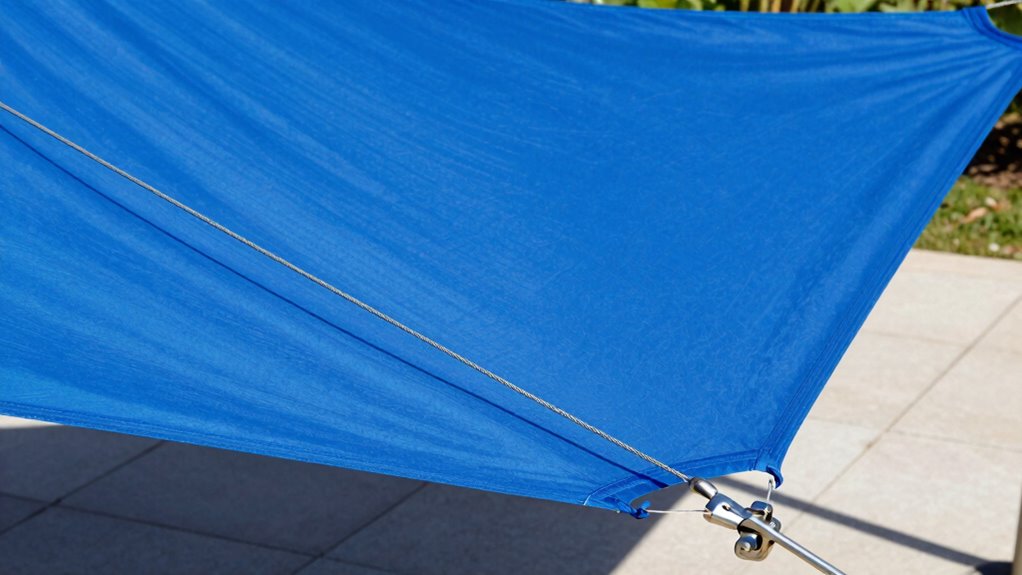
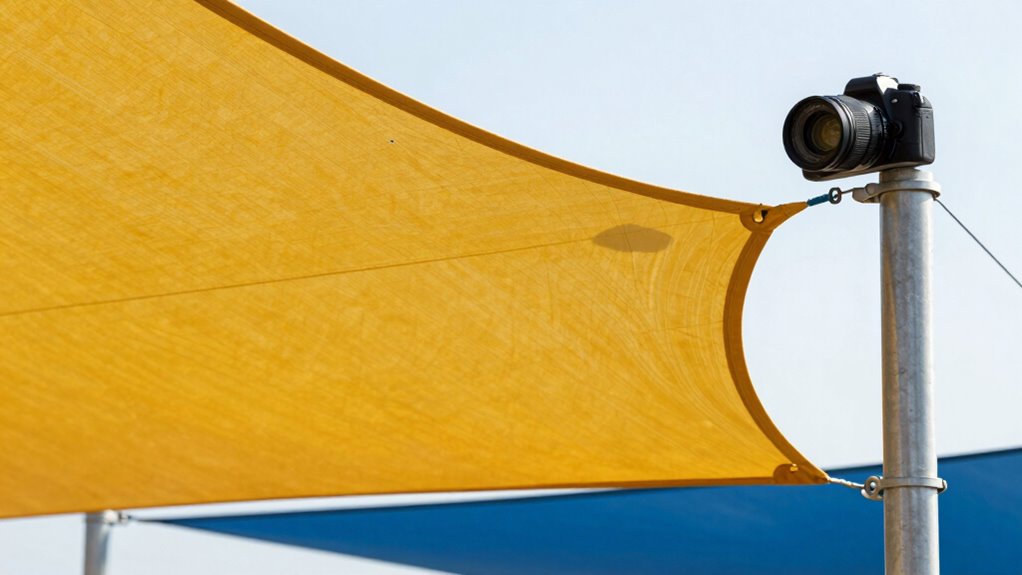
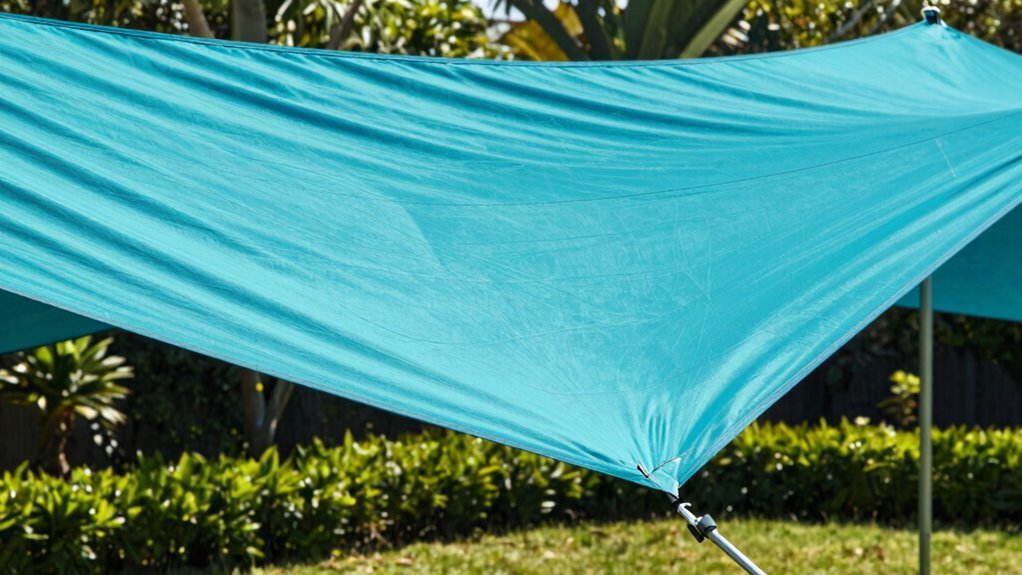
Achieving the right tension in your shade sail starts with precise anchor placement. You want your anchors positioned to create the ideal angle that promotes even fabric stretching. If anchors are too close or too far apart, the tension will be uneven, leading to sagging or excessive strain. Measure carefully to confirm each anchor is placed at the correct height and distance, considering the shape and size of your sail. Proper anchor placement helps distribute tension evenly across the fabric, reducing the risk of tears or sagging over time. Keep in mind that slight adjustments in anchor points can drastically impact tension. When you get this right, your shade sail stays taut, durable, and aesthetically pleasing for years to come. Additionally, understanding the tensioning process and how to make incremental adjustments can prevent common issues like sagging and tearing. Incorporating energetic alignment during installation can also enhance the overall effectiveness and longevity of your shade sail setup.
Consistent Tension Technique
Maintaining consistent tension across your shade sail is essential for a clean, taut appearance and long-lasting durability. Start by selecting the right fabric, as a high-quality, UV-resistant material helps preserve tension over time. Consider your color options too; darker shades tend to hide minor sagging better, while lighter tones can reflect heat more effectively. When tensioning, work gradually and evenly on all sides, tightening each corner in small increments. Use a tensioning tool or turnbuckles to achieve uniform pull without over-tightening. Regularly check the tension after installation and during seasonal changes, since fabric and hardware can stretch or loosen. Additionally, ensuring proper hardware installation and secure anchoring points can significantly impact the overall tension and longevity of your shade sail. Proper tensioning techniques are critical for durability and help prevent unnecessary sagging or tearing. Employing a tension gauge during installation can further enhance precision, ensuring consistent tension throughout. Incorporating routine inspections into your maintenance schedule can also help catch potential issues early, maintaining the ideal tension over time. This consistent approach ensures your shade sail remains taut, preventing sagging and tearing while enhancing its aesthetic appeal.
Avoid Over-Tightening
While tightening your shade sail, it’s crucial to avoid over-tensioning, as too much force can damage the fabric and hardware. Choosing the right fabric is essential; thicker, high-quality materials are more forgiving and less prone to tearing from excessive tension. Consider your aesthetic goals—over-tightening can cause the sail to look unnatural or distorted, detracting from its visual appeal. Aim for a balanced tension that keeps the sail taut without overstressing it. Use proper tensioning tools and check the fabric regularly during installation to prevent over-tightening. Remember, a slightly looser fit can still provide excellent shade and durability, while preserving the sail’s appearance and longevity. Proper tensioning also involves understanding safe operating procedures and using the right tools, which helps prevent damage. Maintaining this balance ensures your shade sail stays secure and attractive over time.
yofit 80Pcs Shade Sail Hardware Kit 6 inch for Triangle Rectangle Sun Shade
[One Kit for Any Design]: Conquer any shade sail project—rectangle, triangle, hexagon, or custom shapes—with one comprehensive 80-piece…
As an affiliate, we earn on qualifying purchases.
As an affiliate, we earn on qualifying purchases.
Tools and Techniques for Tensioning Shade Sails
To guarantee your shade sail is properly tensioned, you’ll need the right tools for adjustments. Using the correct techniques makes tightening easier and more effective. Let’s explore the essential tools and methods to achieve the perfect tension. Proper tensioning not only enhances the aesthetic appeal but also prolongs the lifespan of your shade sail by preventing sagging and tearing, which are common installation mistakes among DIY enthusiasts. Additionally, understanding the material properties of your shade sail can influence the tensioning process, ensuring longevity and durability. Using appropriate tensioning tools designed for shade sails can help avoid over-tightening, which may damage the fabric or hardware. Incorporating precise tensioning techniques can significantly improve the overall stability and appearance of your shade sail, reducing the likelihood of future issues.
Proper Tensioning Techniques
Achieving the right tension on your shade sail is essential for durability and effective shading, and this begins with selecting the appropriate tools and applying proper techniques. Start by choosing high-quality fabric that suits your needs, considering fabric selection and color options for aesthetics and UV protection. To tension the sail correctly, use a tensioning device like a turnbuckle or come-along, which allows precise adjustments. Begin by attaching the sail loosely and gradually tighten it, ensuring even tension across all corners. Check for sag and adjust accordingly, avoiding over-tightening, which can cause tears or fabric stress. Regularly inspect the tension as weather conditions change, maintaining even pull to prolong the lifespan of your shade sail while keeping it taut and secure.
Essential Tools for Adjustment
Selecting the right tools is crucial for effectively tensioning your shade sail. You’ll need a good tensioning device, such as a turnbuckle or ratchet strap, to achieve proper fabric selection and avoid sagging. A sturdy ladder or scaffolding is indispensable when working at installation height, ensuring you can securely reach all attachment points. A measuring tape helps you check tension consistency across the sail, preventing uneven stress. A wrench or socket set is necessary to tighten hardware securely without damaging the fabric. Additionally, a level can ensure your sail remains even, reducing strain on the fabric. Using the proper tools ensures adjustments are precise, minimizing sag and tear caused by improper tensioning. Proper equipment makes the process safer, quicker, and results in a more durable shade sail.
How to Re-Tension Your Shade Sail Over Time

Over time, shade sails can loosen due to tension loss from wind, weather, or regular stretching. To keep your shade sail secure and looking vibrant, re-tension it regularly. Start by inspecting the fabric patterns and color options—you want your sail to stay beautiful as well as functional. Use your tools to tighten the tension points gradually, avoiding over-tightening which can cause tears. Adjust the tension evenly on all corners for a smooth, taut appearance. Remember, proper tensioning preserves your sail’s longevity and appearance.
Regularly re-tension your shade sail to maintain its vibrant look and durability.
- Feel a sense of pride as your shade sail remains perfectly taut, providing consistent shade.
- Experience relief knowing your investment stays protected from sagging or tearing.
- Enjoy peace of mind that your fabric patterns and color options stay vibrant longer.
- Revel in the satisfaction of a well-maintained outdoor space, ready for any weather.
Common Mistakes to Avoid During Installation and Tensioning
Installing and tensioning your shade sail correctly is crucial to guarantee its durability and effectiveness, but many overlook common pitfalls that can compromise the project. One key mistake is poor fabric selection; choosing the right material ensures the sail can withstand weather and tension. Additionally, neglecting to take into account color coordination can lead to aesthetic mismatches, affecting your outdoor space’s look. Failing to measure properly before installation may cause uneven tension or sagging, so double-check all measurements. Also, avoid improper attachment points or using weak hardware, which can cause tears or failure. Remember, tensioning too tightly or too loosely can lead to sagging or tearing. Being mindful of fabric quality, color harmony, and correct tensioning techniques helps you avoid these common errors and achieve a long-lasting, attractive shade solution.
Troubleshooting Tension Problems: When and How to Re-Tighten
Tension problems often become noticeable when your shade sail starts sagging or developing wrinkles, indicating it’s time for a re-tighten. If your sail no longer complements your garden design or clashes with your color options, it’s a sign to address the tension. Re-tightening helps preserve the sail’s integrity and aesthetic appeal.
Consider these signs:
Watch for sagging, wrinkles, and strain signs to know when to re-tighten your shade sail.
- The sail feels loose and floppy, diminishing your garden’s visual appeal
- Wrinkles or sagging make the shade less effective and more prone to tears
- The tensioning points show signs of strain or wear
- Your chosen color options fade unevenly due to improper tension
Maintenance Tips to Keep Your Shade Sail Taut and Durable
Regular maintenance is essential to keep your shade sail taut and long-lasting. Start by inspecting the fabric material regularly for signs of wear, tears, or loose fittings. Clean the sail with mild soap and water to remove dirt and prevent mold, which can weaken the fabric. Avoid harsh chemicals that may damage the material. To prevent color fading, keep the sail away from excessive direct sunlight when not in use, and consider using UV-protective sprays. Check tension points and hardware periodically, re-tensioning as needed to maintain proper tautness. Proper storage during harsh weather or winter months also extends the life of your shade sail. Consistent upkeep ensures your sail remains durable, vibrant, and effective at providing shade for years to come.
Frequently Asked Questions
What Are the Best Materials for Long-Lasting Shade Sail Tension?
For long-lasting shade sail tension, opt for high-quality fabrics like HDPE or polyester, which offer excellent fabric durability. These materials resist UV damage, mold, and stretching. To maintain tension, regularly check and adjust your sail, ensuring the fabric remains taut without overstressing it. Proper material choice combined with routine maintenance helps prevent sagging and tearing, giving you a sturdy, long-lasting shade solution.
How Does Climate Affect Shade Sail Tensioning Strategies?
Imagine a hot, windy summer day, and your shade sail sags dangerously low. Climate considerations directly influence your tensioning techniques; high winds and intense sun cause materials to expand or contract. To prevent damage, you must adjust tension accordingly—tightening in high heat and loosening during storms. By understanding these climate effects, you guarantee your shade sail remains secure, durable, and effective against seasonal weather changes.
Can DIY Tensioning Tools Improve Shade Sail Durability?
Using DIY tensioning tools can definitely improve your shade sail’s durability by helping you maintain proper tension. These tools make it easier to adjust tension consistently, reducing sag and preventing tears caused by over- or under-tensioning. Regular tension maintenance with DIY tools guarantees your shade sail stays secure and in good condition longer, saving you money and effort over time. Just be sure to follow proper tensioning techniques for the best results.
What Are the Signs of Improper Tensioning Beyond Sagging?
You’ll notice improper tensioning through rip edges, loose fittings, and uneven fabric. When tension isn’t correct, the sail can develop tears at weak points, and fittings may feel unstable or shift over time. You might also see puckering or bubbling, indicating uneven tension. These signs show you need to recheck and adjust your tension to prevent further damage, ensuring your shade sail stays secure and durable.
How Often Should I Check and Adjust My Shade Sail’s Tension?
You should check and adjust your shade sail’s tension every 6 to 12 months, especially after severe weather or seasonal changes. During routine maintenance, follow installation tips to guarantee proper tension and inspect for signs of wear or sagging. Also, include cleaning procedures to keep the fabric in good condition, which helps maintain ideal tension. Regular checks prevent sagging, tear, and prolong the sail’s lifespan.
Conclusion
Proper tensioning is vital to prevent sagging and tearing, ensuring your shade sail lasts for years. For example, imagine a homeowner who neglected re-tensioning after a season; their sail sagged and developed tears, costing more in repairs. By regularly checking and adjusting tension, you keep your shade sail taut and durable. Remember, investing a little time now saves you from costly replacements later—so stay vigilant and maintain that perfect tension.